Simple Solution: Cleaning Glass Bottles with Magnets

Cleaning glass

I have had a problem with the inside of my glass bottles getting stuck-on schmutz that couldn’t be cleaned out. The bottles are too narrow for me to reach inside, and no matter how long the bottles soaked in soapy water, and no matter how many times they went through the dishwasher, they just couldn’t get clean.

Cleaning glass

My most problematic bottles are the ones I use for orange juice or lemonade (all that pulp!) and kombucha. Eventually, I stumbled across a product that promised to solve my problem: a two-piece, magnetic scrubber. I was skeptical that the product would work and didn’t want to wait to clean my bottles until I could get one, so I improvised my own magnetic scrubber. AND IT WORKS!!!

Cleaning glass

To make your own scrubber, you need only two things: (1) a strong magnet and (2) a small metal object that is attracted to magnets. I found my strong magnet attached to a clip on my refrigerator- it’s one of those magnets that is shaped like a watch battery. I experimented with a few different small metal objects, but I found a nut (from a nut and bolt) to be best. It’s heavy duty, has a flat surface for scraping, and it is small enough to fit inside all of my bottles.

Cleaning glass

To clean your shmutz, fill your bottle with warm water, and give it a good shake to get the dirt loosened up somewhat. Empty the water, and drop the nut inside. Use the magnet on the outside of the bottle to attract the nut, and then guide the nut over the dirty portions of the bottle. You should be able to see the crusty bits start loosening and moving around. When you think you’ve gotten a lot off (it doesn’t take too many passes), dump out the nut and rinse out your bottle. Repeat as necessary.

Cleaning glass

When you’re done scraping, clean your bottle with soap and water. I cleaned two bottles this way and they both came out sparkling. I am very happy! Some notes: it is possible that this method could scratch your bottles, although mine survived just fine, so don’t use it on anything you’d be upset about getting scratched; if you’re having trouble getting the nut and the magnet to connect, try getting a stronger magnet (also try touching the nut and the magnet outside of the bottle to ensure that they really are magnetic); and lastly, I imagine that this simple solution would not work on glasses that are too thick for the magnetic connection.

Have any of you used the non-improvised magnetic scrubber product or do you have any other tricks for cleaning inside these narrow spaces?

Print Friendly, PDF & Email

Chocolate Covered Orange Peel

Orange peel

My mom is a big fan of chocolate covered orange peels, so when I learned how to make them in my cooking class, I knew that I had to send her a batch. I had fun whipping them up- they are relatively simple to make, smell delicious, and are a nice variation on the kinds of recipes I usually make. I don’t particularly enjoy eating orange peels, but they came out pretty good. My mom was happy to receive them in the mail. She said the peels are much softer than the chewy ones she normally encounters, and she’s right. Maybe that’s why I didn’t mind snacking on a few before packing them up.

Orange peel

One orange makes about 19 strips of orange peels, so get as many oranges as you’d like. Use a knife to slice the top and bottom off of the orange, just enough so that you can see the orange sections. Then, use your knife the score the orange peel from top to bottom at four different places (12 o’clock, 3 o’clock, 6 o’clock, and 9 o’clock), making sure you don’t cut into the fruit. Use your finger to loosen one of the sections of orange peel from the top of the orange, and carefully peel the skin off. Continue peeling the orange until it’s naked. Then, cut each piece of orange peel into 4-5 vertical strips.

Orange peel

Add the orange peels to a pot, and fill the pot with enough cold water to cover the peels. Cover the pot, and bring the water to a boil. Once the water boils, drain the orange peels. Repeat this process 4 more times to draw the bitterness out of the orange peels. All told, you should bring the orange peels to a boil in fresh water 5 times. Now that the oranges have lost their bitterness, it’s time to candy them. Return the peels to the pot, and add 1 cup of water at a time until the peels are covered. Add half the amount of sugar to the pot as well. So- if you added 2 cups of water, add 1 cup of sugar. Bring the water to a boil, and reduce it to a simmer once the sugar has dissolved.

Orange peel

Put a lid on the pot, and simmer the orange peels until they are soft. The orange peels are done when they go limp when you hold them up, but you shouldn’t cook them so long that they can’t hold their shape.

Orange peel

Transfer the peels to a rack to cool and dry. Once the orange peels have completely cooled, you can either toss them in coarse sugar to make candied orange peels, or you can coat them in chocolate like I did. If you’re going for the chocolate, pat all of the orange peels completely dry with a towel.

Orange peel

Melt some dark chocolate. I filled a small pot with water, brought it to a simmer, and put a glass bowl on top of the pot. The heat gently melts the chocolate and prevents it from burning.

Orange peel

Dip the orange peels into the chocolate, and then set them on a piece of parchment paper to cool. I’m not a pro with chocolate, but it seems like a good idea to put the freshly coated orange peels into the refrigerator to set for an hour or so. I let mine cool at room temperature, and they formed some condensation over night and the chocolate didn’t fully harden. I put them in the fridge the next morning, and that seemed to make things better.

When the orange peels are fully set, eat away! I’m thinking about trying to make candied ginger next. Do you have any other suggestions, or tips for covering things in chocolate?

Shopping list:

  • Orange
  • Sugar
  • Dark chocolate
Print Friendly, PDF & Email

Pho and Phriends

Pho

I love pho, especially when I get to share it with friends. I think I first enjoyed this flavorful Vietnamese soup when I was living in Paris, and the many places that serve it in DC continue to keep me satisfied. My favorite pho truck even stops by my office every week, so I can slurp up rice noodles and bean sprouts on the regular. I usually opt for beef pho, but when my friends and I saw a recipe for chicken pho pop up online, we immediately made plans to get together and make it in an event that was sure to span a long and wonderful day. We were not disappointed. We spent a glorious 12 hours eating (cheese, pickled grapes, candied chickpeas, Vietnamese coffee ice cream, and pho, of course), laughing, attempting yoga poses, and generally rejuvenating our souls. This pho is an invitation to make soup and happy memories.

Pho

If you’re going to make the chicken stock on the same day that you plan to eat the pho, then you have quite a few hours ahead of you. We loved having that time to lounge around, but, if you’re on a more expedited schedule, I think it would be perfectly fine to start with already-prepared chicken stock, modifying the recipe as I’ll indicate below.

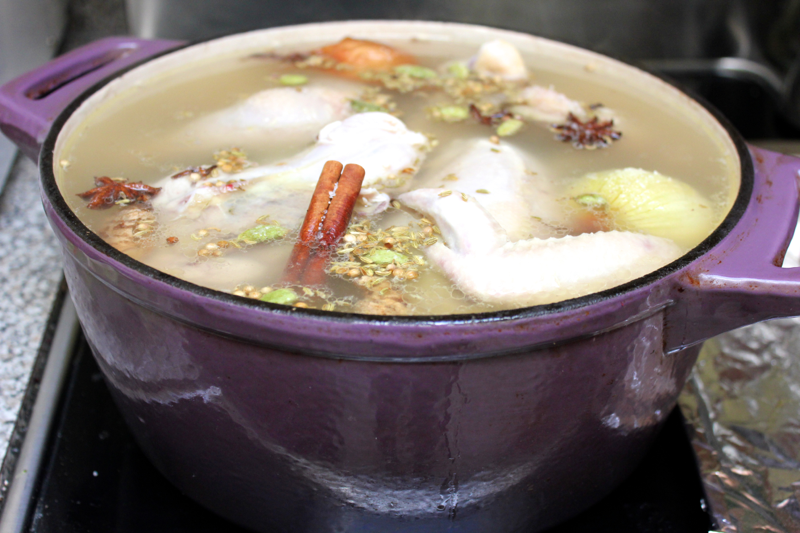
But if you’re starting from scratch, heat your oven to 400º F. Quarter 2 onions, and smash 3 pieces of ginger (1/2 inch each) with the side of your knife. Put the onion and ginger on a baking sheet, and char them in the oven for about 30 minutes. While the charring is underway, fill a very large stock pot with 4 quarts (16 cups) of water, and bring it to a boil. While the water boils, cut the back bone out of a 3.5-4 pound chicken. Then, use a sharp knife to quarter the chicken- cut the chicken in half lengthwise between the breasts, and then use the knife to separate the thighs from the breasts. Alternatively, you could use an already cut-up chicken or 4 pre-butchered chicken quarters. When the water boils, add the chicken back and quarters to the pot along with 1.5 pounds of additional chicken wings, the charred onion and ginger, 1 tablespoon of kosher salt, and 2 teaspoons of sugar. Add in the aromatics as well: 2 cinnamon sticks; 4 star anise; 1 tablespoon of green cardamom pods, 1 teaspoon of coriander seeds, 1 teaspoon of cloves, and a few basil and/or cilantro stems. Phew!

Pho

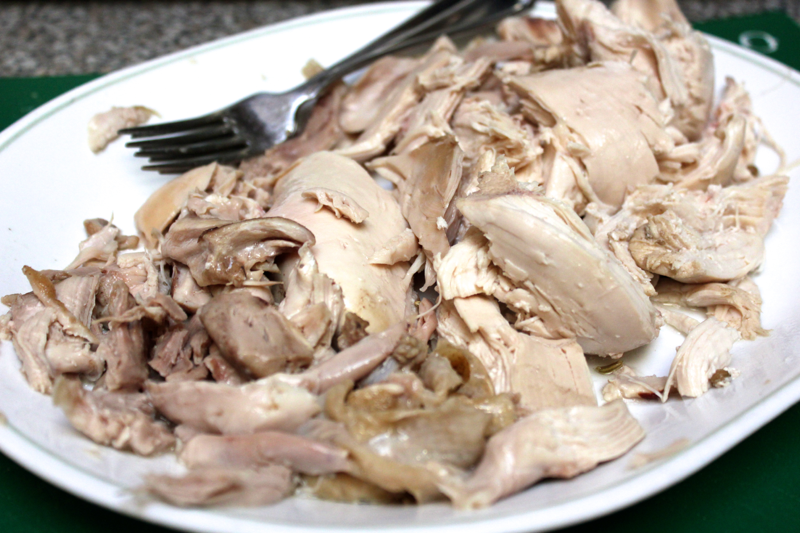
Reduce the stock to a simmer, and let it cook gently, uncovered, for 30 minutes until the chicken quarters are cooked through. Remove the chicken quarters (not the chicken wings) from the stock, let them cool slightly, and then pull the meat off of the bones. Refrigerate the meat, and add the bones back into the pot.

Pho

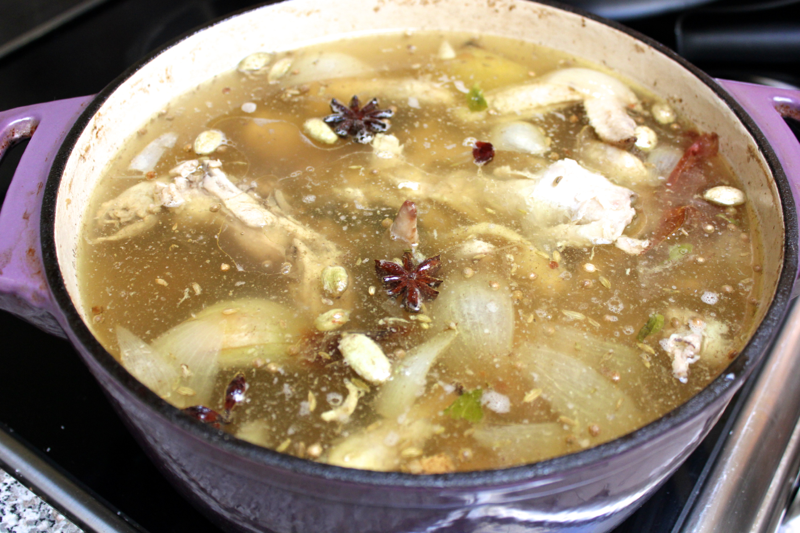
Allow the stock to simmer for 2 hours.

If you’re making pho using already prepared chicken stock, then begin by filling the pot with 4 quarts of stock. Add the smashed ginger, a quartered chicken, and all of the aromatics. Simmer the stock for 30 minutes until the chicken cooks, remove the meat from the bones, and then let the stock simmer for another 30 minutes or so until the flavors are infused. Proceed with the rest of the recipe.

Pho

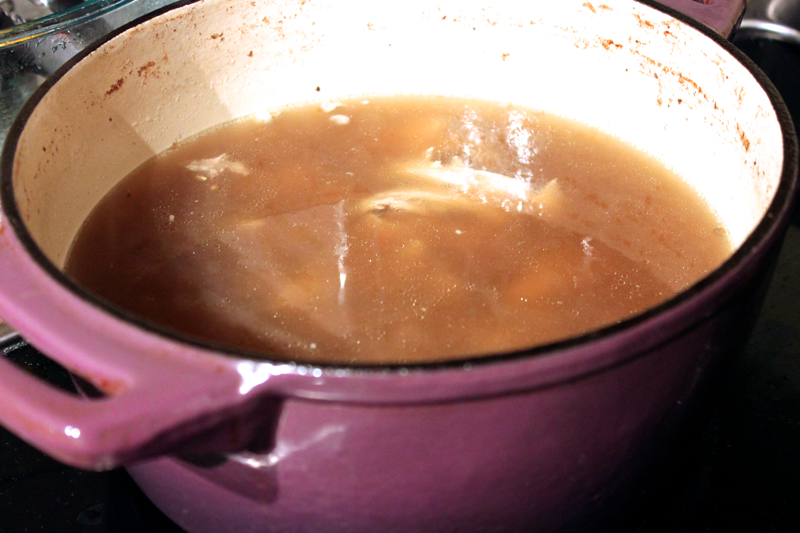
Strain the stock to remove all of the chicken bones, herbs, and spices. Remove the fat from the chicken stock – I prefer using a fat separator, but you could also try to skim it off with a spoon. Alternatively, if you plan to eat the pho on another day, allow the stock to cool, refrigerate it, and then remove the fat once it has hardened. Keep the stock on a low simmer, and add between 1/8 and 1/4 cup of fish sauce to taste. Return the chicken meat to the pot to re-warm.

Pho

In a separate bowl of warm water, soak the rice noodles for about 20 minutes until they are pliable, or prepare them according to their package’s instructions.

While the noodles soften, prepare your toppings. In a small saucepan, heat 2 cups of vegetable oil over medium-high until it reaches 275° F. Use a candy thermometer if you’d like to be precise and avoid burning your toppings. While the oil heats, thinly slice 4 shallots. Add the shallots to the oil, and fry them until they are a golden brown color. Use a slotted spoon to transfer the crispy shallots to a paper towel-lined plate to drain. Sprinkle the shallots with salt. Try not to eat too many of them before the soup is ready…it’s a true challenge! Prepare your other garnishes- gather some bean sprouts, basil, cilantro, lime wedges, and sliced jalapeño.

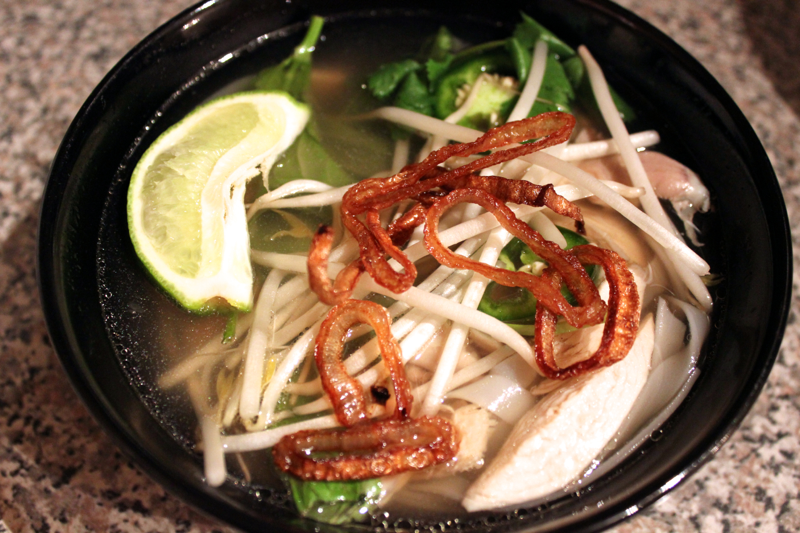
Once everything is prepared, assemble your bowls! Add in some of the rice noodles. Top the noodles with your very flavorful broth and chicken. Add a few jalapeño slices, some basil and cilantro leaves, a handful of bean sprouts, and a squeeze or three of lime. Top the soup with the crispy shallots. Grab your chopsticks and spoon and enjoy! If you like, you can also stir some hoisin sauce or sriracha into the soup for added flavor (not that it needs it). I hope this healthy, hearty, and warming bowl of happiness gives you a reason to bring the people you love together.

This recipe is adapted from Smitten Kitchen.

Shopping list:

  • Onions- 2
  • Fresh ginger- 1.5 inches
  • Whole chicken- 3.5-4 pounds
  • Chicken wings- 1.5 pounds
  • Kosher salt- 1 tablespoon
  • Sugar- 2 teaspoons
  • Cinnamon sticks- 2
  • Star anise- 4
  • Green cardamom pods- 1 tablespoon
  • Coriander seeds- 1 teaspoon
  • Cloves- 1 teaspoon
  • Fish sauce- up to 1/4 cup
  • Rice noodles- 1 pound
  • Bean sprouts
  • Basil
  • Cilantro
  • Lime
  • Jalapeño
  • Vegetable oil- 2 cups
  • Shallots- 4
Print Friendly, PDF & Email