Tasty Taro Chips

Tasty Taro Chips

I am still trying to figure out how to manage my life in Philadelphia, so I sometimes get my groceries delivered from an online service. Frequently, I end up with far too much of something. Right now, it’s rhubarb. But a few weeks ago, it was taro. Whenever I buy those bags of assorted root vegetable chips, I always love the taro chips the most. They’re the white ones with almost purplish-looking squiggles. There are never enough taro chips in the bag, especially when my sister is around, because they’re her favorite too! I saw taro was available from my online grocer and thought I’d try making chips for my sister. But the taro was priced by the pound, confusingly cheap, and I ended up with too much…too much. Fortunately, the chips are delicious!!

Tasty Taro Chips

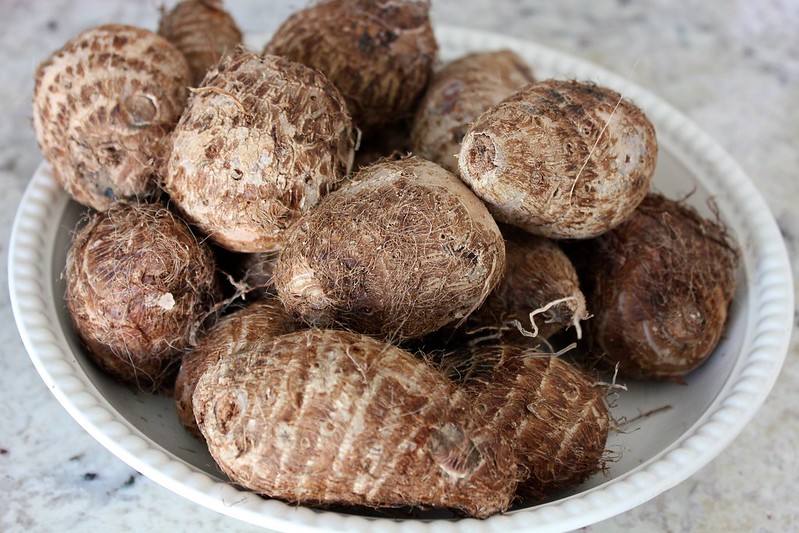
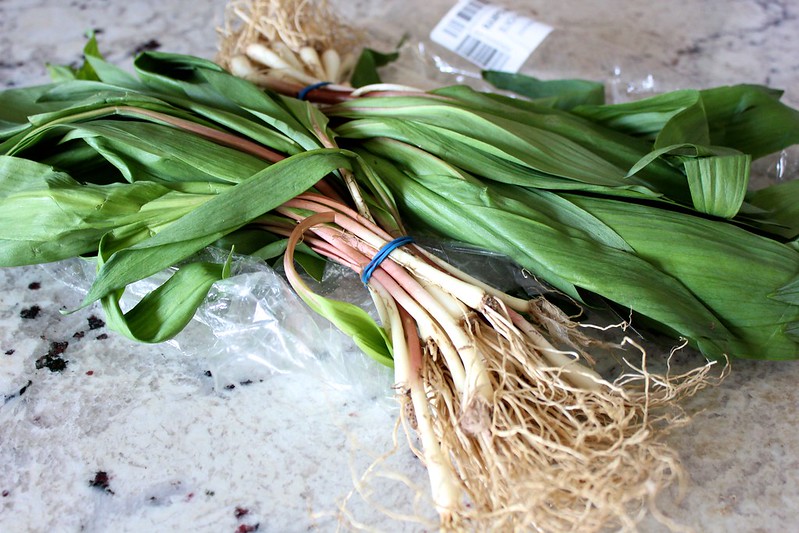
Get a bunch of taro. It’s pretty hairy and coconut-like on the outside.

Tasty Taro Chips

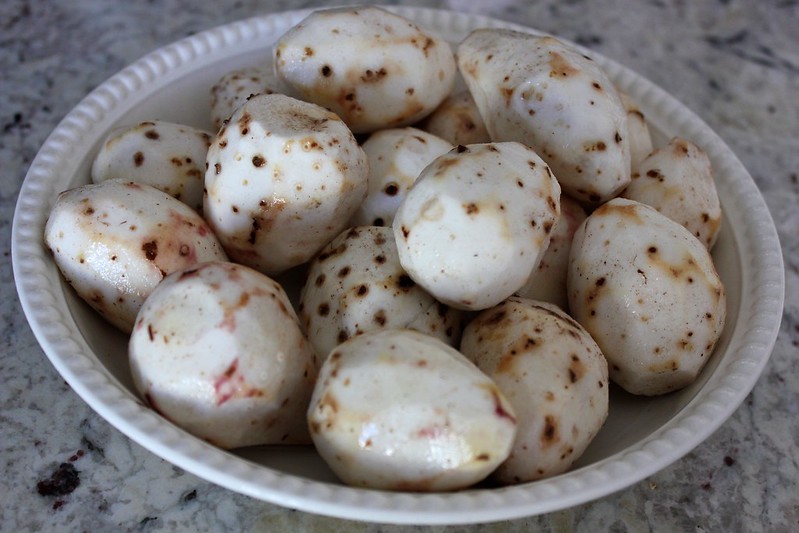
Peel the taro using a vegetable peeler. This is the most difficult part of the whole process, because the taro flesh is really slippery. Rinse the taro off.

Tasty Taro Chips

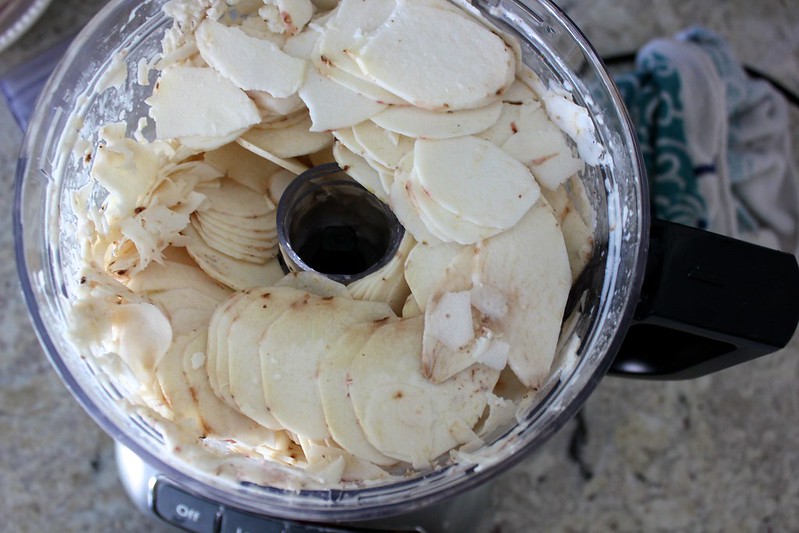
Since the taro are so slippery, I don’t recommend slicing them manually. Instead, use a food processor’s slicing attachment, adjusted to the thinnest setting, to slice the taro into chips. It’s super fast and easy and makes up for all that time spent peeling!

Tasty Taro Chips

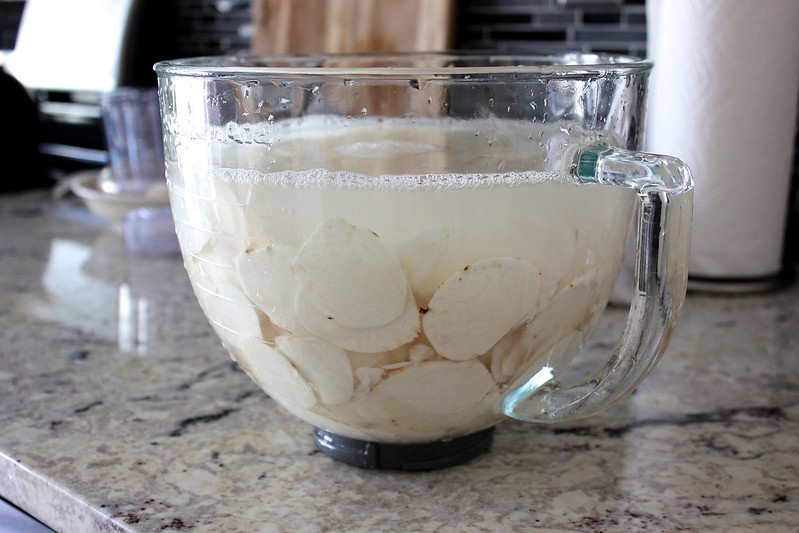
The taro is so slippery because it is full of starch. To prevent the taro chips from sticking together during frying, let them soak for a bit in a large bowl of cold salt water. The salt water will flavor the taro chips and rinse off the excess starch.

Tasty Taro Chips

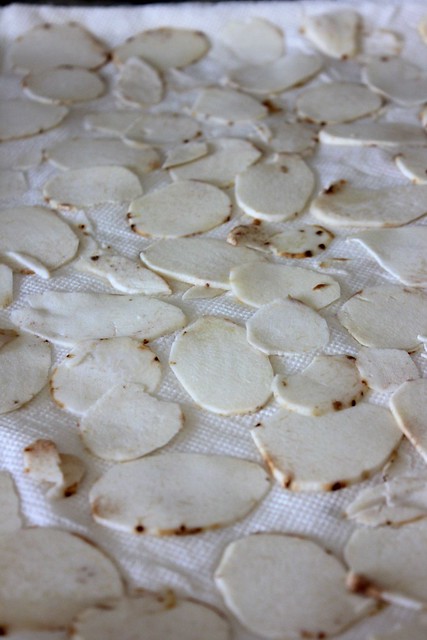
It’s important to dry the taro thoroughly before frying it. Spread the taro evenly between layers of paper towels to get the job done.

Tasty Taro Chips

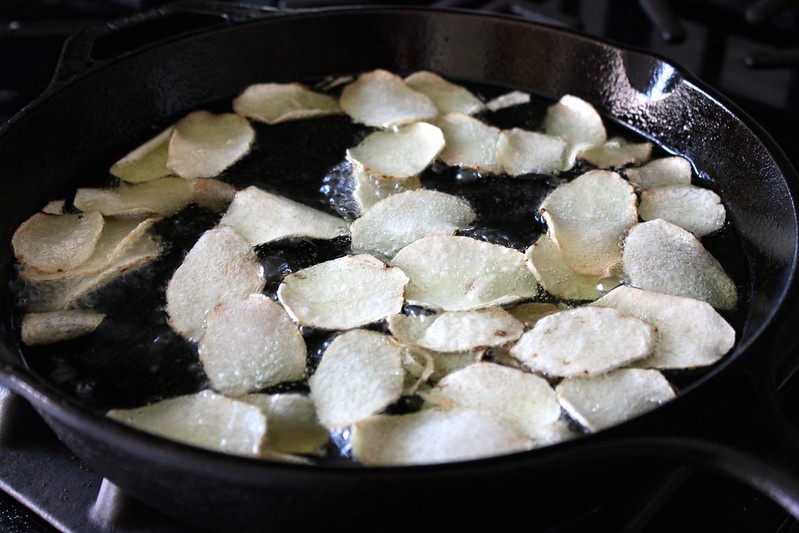
Heat about 1 inch of oil in a cast iron skillet over medium/medium-high heat. Grapeseed oil is great because it isn’t prone to smoking. It’s expensive, but when you’re done frying, you can strain it and use it again and again. When a small bit of taro sizzles as soon as you drop it in the oil, you’re ready to start frying. Drop a large handful of the taro chips into the oil, and give them a stir to spread them out.

Tasty Taro Chips

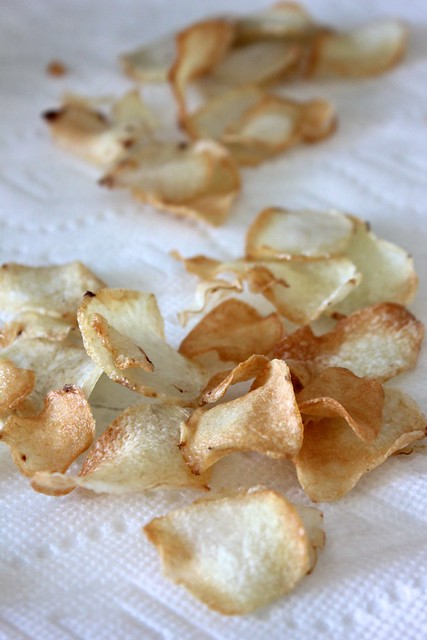
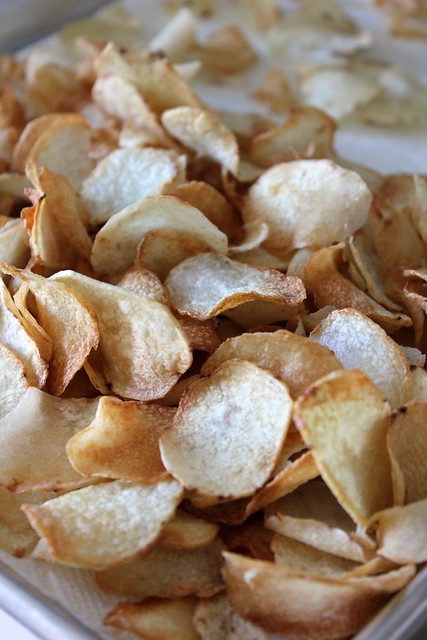
When the taro chips have lightly browned around the edges, remove them with a mesh skimmer, and transfer them to a paper towel-lined baking sheet to drain. If you want to salt them more, now is the time to do it. The taro chips will crisp up as they cool.

Tasty Taro Chips

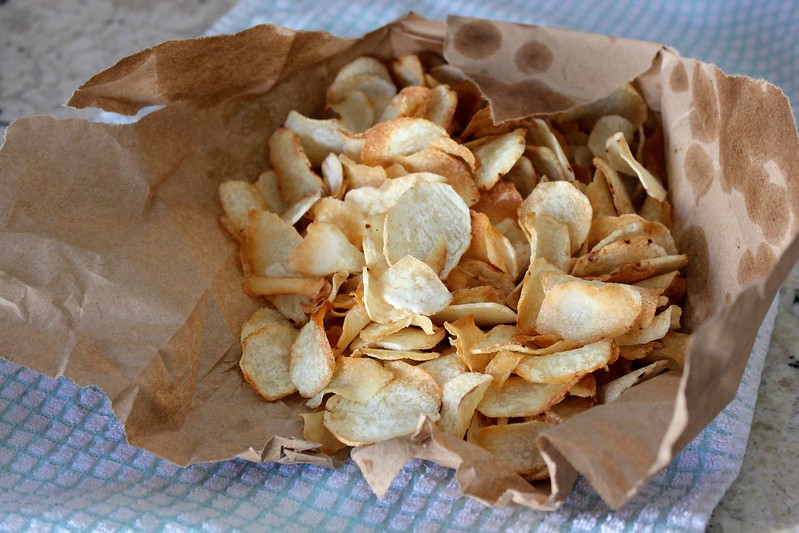
Continue frying all of your taro in batches. Once they are all drained and completely cool, you can store them in crimped brown paper bags for a few days- if they last that long. To help keep them crisp and fresh, you can put some dried rice grains in a fillable tea bag (or cheesecloth) and drop that in the bag of chips to suck up any moisture. A word of warning- you can’t eat just one chip, so definitely don’t try one before dinner! My sister and I both made that mistake 🙂

Shopping list:

  • Taro root
  • Oil
  • Salt
Print Friendly, PDF & Email

Ramp Pesto and Its Many Pleasures (Like Pesto Potato Pizza!)

Ramp Pesto and Its Many Pleasures

Life is full of changes right now and, fortunately, most of them are good. New dog, new job, and new spring produce like ramps! Over the years, I have struggled to find a recipe that best maximizes the mild oniony flavor of hyper-seasonal ramps, and this pesto does the trick. It extends the ramps’ shelf life and makes it possible to add their flavor to a wide variety of dishes. One of my friends even freezes her ramp pesto in ice cube trays so she has some on hand throughout much of the summer.

Ramp Pesto and Its Many Pleasures

To make it, toast 1/2 cup of hazelnuts in a 350° F oven until they smell toasty and look golden. While the nuts toast, give 8 ounces of ramps a good washing. Trim the roots off of the bottoms, roughly chop the ramps, and put them in a food processor.

Ramp Pesto and Its Many Pleasures

Add the hazelnuts to the ramps and turn on the food processor. With the food processor running, drizzle in about 1/2 cup of olive oil until the mixture forms a loose paste.

Ramp Pesto and Its Many Pleasures

Transfer the pesto to a bowl, and stir in 3-4 tablespoons of grated parmesan cheese, then taste the pesto and season it with salt as needed. Transfer the pesto to jars, and store it in the refrigerator for up to a few weeks, if you don’t use it up before then. You can add a dollop of pesto to soups or stews. Stir it into warm pasta for a delicious sauce. Toss it with raw shrimp before searing for tasty flavor. Spread some inside of a sandwich. Add a bit as a condiment on a cheese plate. Roll them in pesto parmesan palmiers for an easy appetizer.  Or…

Ramp Pesto and Its Many Pleasures

…make potato pizza! Make or buy pizza dough. Heat your oven as high as it will go (mine goes to 550° F). Very thinly slice a russet potato on a mandoline. Stretch the dough out into a thin crust on a pizza peel, if you’re using a pizza stone in your oven, or on a baking sheet. Spread the dough with some pesto.

Ramp Pesto and Its Many Pleasures

Top the pesto with an even layer of potato slices. Top the potato slices with a light sprinkling of shredded mozzarella cheese and grated parmesan cheese. Season the whole thing with salt, and throw on some pine nuts (I got so excited that I forgot to add mine).

Ramp Pesto and Its Many Pleasures

Bake the pizza for approximately 10 minutes until the crust is golden brown and the potatoes are tender. Slice and enjoy that springy ramp flavor!

Shopping list:

  • Ramps- 8 ounces
  • Hazelnuts- 1/2 cup
  • Olive oil- 1/2 cup+
  • Parmesan cheese- 3-4 tablespoons, grated
Print Friendly, PDF & Email

Sweet and Tangy Rugelach

Sweet and Tangy Rugelach

Whenever I eat rugelach, I think of the time my friends moved all of the furniture out of their apartment, rented a large dining table and chairs, and hosted one delicious Hanukkah dinner. The host and I made latkes for the occasion, and another friend showed up with a plate of the most beautiful, homemade rugelach. After laboring over my own rugelach, I am even more impressed with his seemingly effortless contribution. The flaky, tangy dough in this version balances out the jammy, chocolatey, nutty filling within for a perfect bite. I practiced making this recipe repeatedly to simplify it and come up with the most reliable method. I made it so many times that my Smitten Kitchen cookbook would fall open to the rugelach recipe– IF its pages weren’t stuck together!

Sweet and Tangy Rugelach

If you’re making rugelach from start to finish in one day, begin before noon. To make the dough, completely soften 1/2 pound of butter (2 sticks) and 1/2 pound of cream cheese (1 brick) at room temperature. Add them to a stand mixer with the paddle attachment, and beat them until they are aerated and fluffy. In a separate bowl, stir together 2 cups of flour and 1/2 teaspoon salt. Pour the dry ingredients into the stand mixer, and beat it on low just until everything is combined.

Sweet and Tangy Rugelach

Tear off 3 sheets of plastic wrap, and divide the dough between them. Wrap the dough up, and shape each packet into a flattened disc. Chill the dough in the refrigerator for about 3 hours or until it is completely firm throughout.

Sweet and Tangy Rugelach

Once chilled, prepare your fillings. Warm 2/3 cup of jam in a small pot until it is spreadable. Separately, stir together 1/3 cup of sugar and 1/2 tablespoon of cinnamon. Chop 3 tablespoons of toasted nuts. Also chop 3 ounces of dark chocolate. Then, remove one disc of dough from the refrigerator. Tear off a sheet of parchment paper, and sprinkle it and your rolling pin with flour. Unwrap the disc of dough, and roll it into a thin circle. No need for things to be perfect, but the goal is to keep the dough from getting warm. So word to the wise: don’t work your dough on a countertop that is warm from a running dishwasher!!

Sweet and Tangy Rugelach

Spread the dough with 2 or 3 tablespoons of jam. Sprinkle over 3 tablespoons of cinnamon sugar, 2 tablespoons of chopped chocolate, and 1 tablespoon of chopped nuts. Use a sheet of wax paper to gently press the fillings onto the dough. Then, slide the parchment paper and dough round onto a cookie sheet, and put it into the refrigerator to chill. This step will make the rugelach rolling process much easier.

While the first round of dough is chilling, repeat the rolling and filling process with the remaining discs. When you’re done, heat your oven to 350° F.

Remove the first round of dough from the refrigerator, and slice it into 16 wedges. A pizza cutter is the perfect tool. Roll the rugelach inwards, slice by slice, from the outer crust to the inner point. You may have to wait a few minutes for the dough to warm up just enough so it reaches a rollable state. Transfer each rolled cookie to a parchment lined baking sheet.

Sweet and Tangy Rugelach

Keep the rolled cookies in the refrigerator while you repeat the process with the remaining rounds. Once all of the cookies are formed and spread evenly on baking sheets, brush each one with an egg wash, a mixture of 1 egg yolk and a small splash of water. Sprinkle the top of each cookie with a little bit of the remaining cinnamon-sugar mixture.

Sweet and Tangy Rugelach

Bake the cookies for 20 to 25 minutes, until they are golden brown on top. Once out of the oven, immediately transfer each cookie to a cooling rack. If the cookies cool on the baking sheet, the oozy jam may make them stick to each other.

Sweet and Tangy Rugelach

Once cool, pass these cookies around a table full of friends. If you have extras, they freeze really well and can be defrosted at room temperature and briefly toasted before serving. But be warned, if you make these once, you’ll field constant requests for more. A labor of love indeed!

This recipe is from the Smitten Kitchen Cookbook.

Shopping list:

  • Butter- 2 sticks
  • Cream cheese- 2 brick
  • Flour- 2 cups
  • Salt- 1/2 teaspoon
  • Jam- 2/3 cup
  • Sugar- 1/3 cup
  • Cinnamon- 1/2 tablespoon
  • Nuts- 3 tablespoons
  • Dark chocolate- 3 ounces
  • Egg- 1 yolk
Print Friendly, PDF & Email