Nutella-Banana Crêpes

Nutella-Banana Crêpes

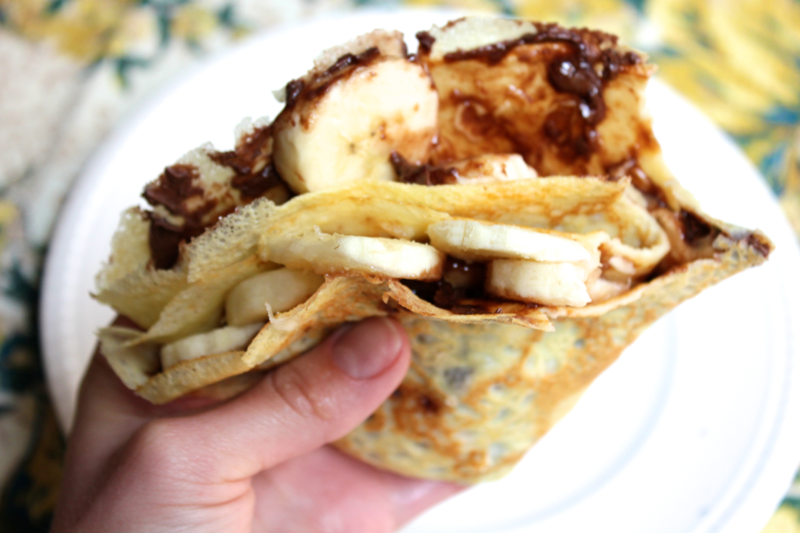
Have you eaten your fill of savory crêpes yet? I certainly have, so it’s time for dessert. My favorite sweet crêpe filling is a classic: melty Nutella and warm rounds of sweet banana. My favorite Nutella-banana crêpe maker in Paris had a fancy way of slicing the bananas in the blink of an eye. He’d pull back a section of the banana peel and use a paring knife to deftly cut the banana into coins, all while it remained in the peel and his hand. Then, he’d perfectly fan the banana rounds out onto the crêpe, atop the warming Nutella. The anticipation nearly killed me every time.

Nutella-Banana Crêpes

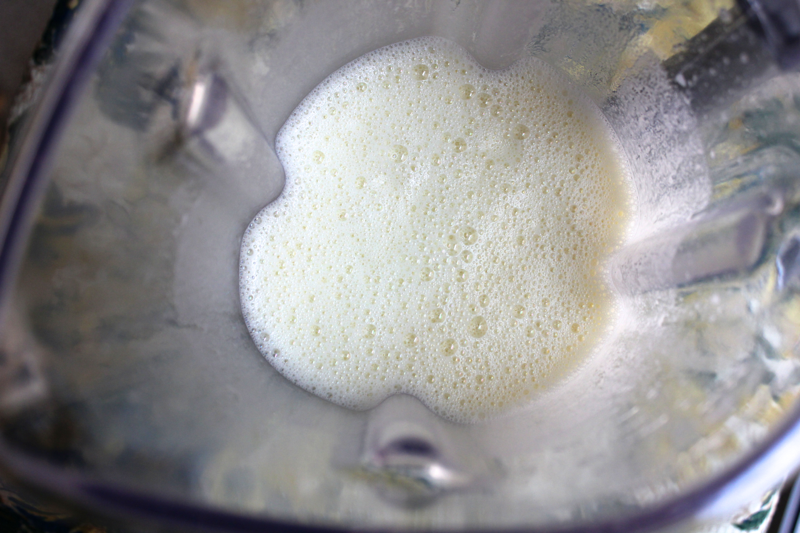
To make crêpe batter suited for sweet applications, combine 2 eggs, 1.5 cups of milk, 1.5 tablespoons of melted butter, and a pinch of salt in a blender. With the blender running, gradually add in 4 ounces of all-purpose flour. Blend until the flour is combined. Because this batter has no sugar in it, you could use it for savory crêpes as well, but I much prefer buckwheat batter for those.

Nutella-Banana Crêpes

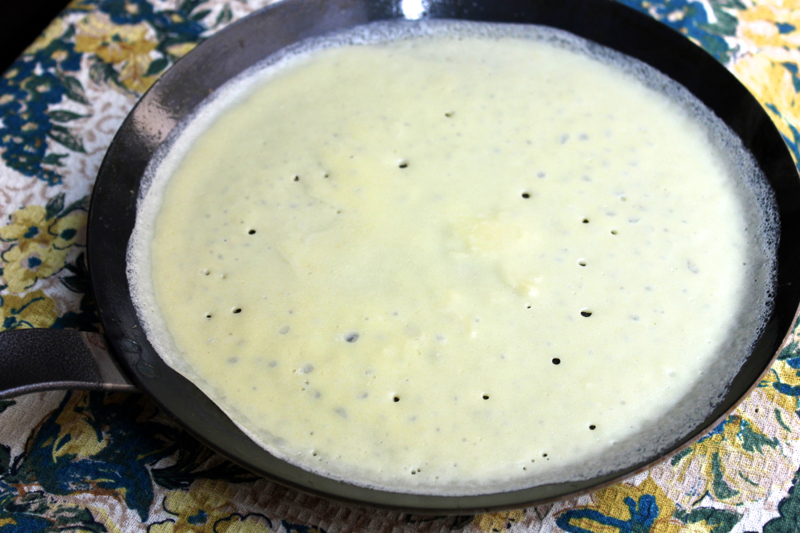
Heat a crêpe pan over medium heat. Before pouring the batter in for each crêpe, lightly spray the pan with vegetable oil. Pick up the pan in one hand, and then use a ladle to pour in just enough batter to coat the bottom of the pan. As soon as the batter hits the pan, use your wrist to rotate the pan around to spread the batter in a circle. Your pan should be at a temperature so that the batter begins to set as soon as it hits the pan, but it shouldn’t cook so quickly that it forms bubbles and isn’t able to spread.

Nutella-Banana Crêpes

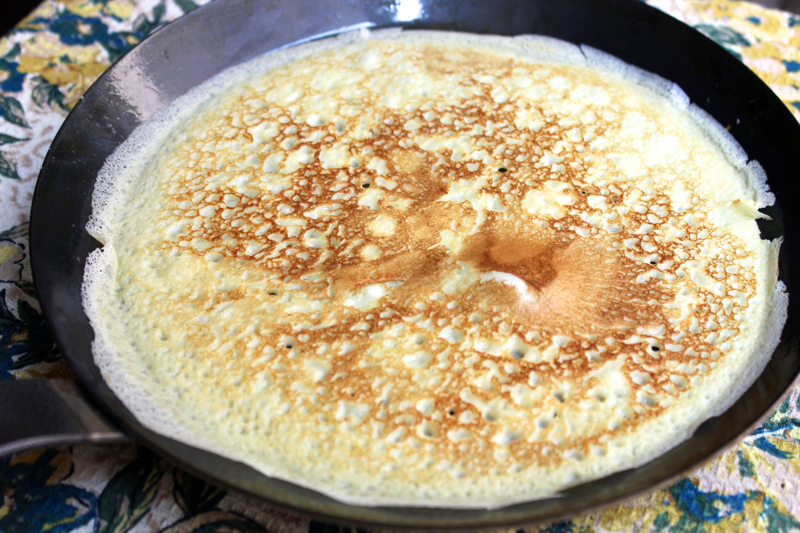
Return the pan to the heat, and once the crêpe looks dry, run a flat rubber spatula around the edges of the crêpe. Stick the spatula under the crêpe, and flip it over. Let the crêpe cook for about 30 seconds on the second side, just until it begins to brown.

Nutella-Banana Crêpes

Transfer the crêpe to a sheet of wax paper. Continue making crêpes, remembering to brush the pan with oil before each one. Once you have a stack of crêpes, you can either begin filling and eating them immediately, or you can wrap them well in wax paper, tin foil, and plastic and freeze them. Stella’s nose was going WILD from these, and she was so happy when I threw her a tiny scrap. See her tongue just starting to attempt a lick?

Nutella-Banana Crêpes

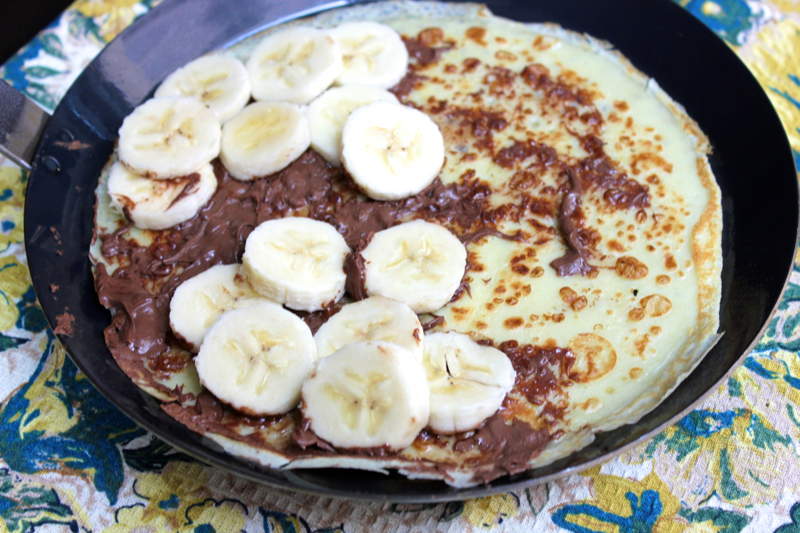
Once the crêpes are prepared, lay one flat in a warm pan. Spread half of the crêpe with Nutella, and then evenly layer on some banana slices. After the toppings have warmed through and the crêpe has gotten a little crispy, fold it up. For a hand-held crêpe, fold it in half twice to make a triangle. You could replace the Nutella and banana with whatever sweet fillings make you happy. Powdered sugar and slivered almonds, strawberries and whipped cream, poached pears and vanilla ice cream are all perfect pairs. Yum! One time, however, I confused the French words for banana and pineapple, and I ended up with a crêpe combo that I don’t recommend. Dommage!

Shopping list:

  • Eggs- 2
  • Milk- 1.5 cups
  • Butter- 1.5 tablespoons
  • Salt- 1 pinch
  • Flour- 4 ounces
  • Vegetable oil
  • Nutella
  • Banana
Print Friendly, PDF & Email

Tips for Grilling Fish

Tips for Grilling Fish

After too many years without access to a grill, I am finally learning how to cook in the great outdoors. Whole Foods recently had a great deal on salmon, so I bought a large filet and set off experimenting. I marinated some of the salmon in a mixture of soy sauce, sesame oil, grated ginger, and miso for about 20 minutes before grilling it. I put the marinated salmon on the grill while it was still wet, and it cooked just fine. Other salmon, I cooked plain, and then brushed it with teriyaki sauce twice, once after flipping it on the grill and again after removing it from the grill. Both methods were delicious and flavorful! I’d use them both again.

My most important finding of the experiment is that it’s best to grill fish skin-side down first. It made flipping the fish much easier, and all of the salmon released cleanly when it was time to take them off of the grill. Grilling the flesh side first resulted in some pieces of salmon sticking to the grill and breaking off when it was time to flip them. My guess is that cooking with the skin-side down first allowed the rest of the salmon to firm up and hold together better.

As for cook times, my indoor knowledge translated well to the grill and didn’t require much experimentation. We let the salmon cook on the first side until the tops just turned opaque, then we flipped them and let them cook for another 1-2 minutes. After the salmon had a chance to rest, each piece was moist and juicy and retained its pink center. From now on, I’ll feel much more confident grilling full-priced fish!

Print Friendly, PDF & Email

Tortilla Española and Garlic Aioli

Tortilla Española and Garlic Aioli

My group of friends recently held a Spanish edition of the Global Supper Club, which gave me an excellent excuse to finally learn how to make a Spanish tortilla. Tortilla Española is essentially a potato frittata, and I absolutely love it. No trip to a tapas restaurant is complete without one (my favorite DC offerings come from Bodega and Estadio). I have investigated making a tortilla in the past, but I was always put off by the vast amount of olive oil that is needed to cook one. Although this recipe does use a lot of oil to cook the potatoes, rest assured that most of it gets drained off, and the end result doesn’t taste oily at all. In fact, it tastes delicious- especially when paired with a zesty, homemade garlic aioli. The tortilla can be eaten with any meal of the day, and it is great to make ahead because it reheats wonderfully or can be served at room temperature. Party food at its finest.

Tortilla Española and Garlic Aioli

To make a tortilla, get 2 large baking potatoes (about 1.5 pounds), and peel them. Then, use a mandoline to slice them crosswise into thin, 1/8 inch rounds. Finely dice 1 medium onion as well.

Tortilla Española and Garlic Aioli

In a 10-inch skillet, heat about 1.25 cups of virgin olive oil over medium heat. There’s no need to use more expensive extra virgin olive oil here. When a piece of onion sizzles in the olive oil, gently add in all of the potatoes and onion. The potatoes should be able to slide around in the oil- if not, add enough oil so they can. Adjust the oil’s temperature so that the potatoes simmer gently. Let the potatoes cook for about 10 minutes, scraping them up from the bottom of the pan and stirring them around frequently. The potatoes are done when they can all easily be pierced with a fork.

Tortilla Española and Garlic Aioli

Set a colander over a bowl, and pour in the potatoes and onions to drain. In a separate bowl, whisk together 4 eggs, and season them well with salt. If you don’t plan to serve the tortilla with a garlic aioli, you can whisk 2 grated garlic cloves into the eggs as well. Once the potatoes and onions are drained, season them very well to taste with salt. Then, mix the potatoes and onions into the scrambled eggs, and stir them around to coat them.

Tortilla Española and Garlic Aioli

Now it’s time to prepare your skillet for making the tortilla. Wipe out any potato remnants or leftover particles to keep them from burning. Then, use the drained off oil that the potatoes cooked in to grease the bottom and sides of the pan very well. Heat the skillet over medium-high, and then pour in the potato and egg mixture. Give the pan a few shakes to even out the potatoes, and then turn the heat down to medium. I always thought that you had to individually layer the potatoes into a tortilla because they always seem to be perfectly arranged, but it turns out that they arrange themselves nicely after a casual dumping! Let the tortilla cook for about 10 minutes until you can shake the pan and the potatoes on top hardly jiggle.

Tortilla Española and Garlic Aioli

Run a spatula around the outside edges of the tortilla to make sure that it is not stuck to the skillet, and then get ready to flip it. Get a plate and lay it face down on top of the skillet. Place one palm down on the plate, holding it to the skillet, and then flip the skillet over in one fell swoop. Be fearless and go for it! The tortilla should gently drop from the skillet onto the plate. Remove the skillet, and wipe out any stuck-on food bits. Brush the skillet with more of the oil, and then slide the tortilla back in. Now, the uncooked part of the tortilla should be on the bottom. Let the tortilla cook for about 5 more minutes, and then transfer it to a clean plate to cool.

Tortilla Española and Garlic Aioli

While the tortilla cools, move on to the aioli. If you don’t feel like making aioli at home, or don’t want to eat a raw egg yolk (goodbye Caesar dressing and hollandaise!) you can mix some grated garlic into mayo, which is what Jacques Pepin’s cookbook recommends. It’s easiest to make aioli in a blender, but I was having sink/dishwasher issues, so I made it by hand instead. In a blender or bowl, combine 1 egg yolk, 1 grated clove of garlic, a dab of dijon mustard, a squeeze of lemon juice, and a dash of salt. If making the aioli by hand, continue whisking the egg yolk until it gets pale and more voluminous.

Tortilla Española and Garlic Aioli

With the blender running or your whisk constantly and rapidly moving, slowly drizzle in about 1/3 cup of a neutral oil. I used olive oil here, but a flavorless oil would have been better. Incorporate the oil until the aioli has taken on a thick, mayo-like consistency. Store the aioli in the refrigerator until you are ready to serve it.

Tortilla Española and Garlic Aioli

Cut the tortilla into wedges or squares, and serve it with a small dollop of aioli and a light sprinkling of chives for color. And you know what goes great with this tortilla? The rest of our supper club dinner! Jamón, manchego, cantaloupe, patatas bravas, gazpacho, lemony stuffed calamari, and flan rounded out the feast.

This tortilla recipe was adapted from Serious Eats.

Shopping list:

For the tortilla:

  • Russet potatoes- 1.5 pounds
  • Onion- 1, medium
  • Virgin olive oil- 1.25 cups
  • Salt
  • Eggs- 4

For the aioli:

  • Egg yolk- 1
  • Lemon juice
  • Garlic- 1 clove
  • Salt
  • Dijon mustard
  • Neutral oil- ~1/3 cup
Print Friendly, PDF & Email