Crusty Dijon Chicken with Fennel Salad

Crusty Dijon Chicken with Fennel Salad

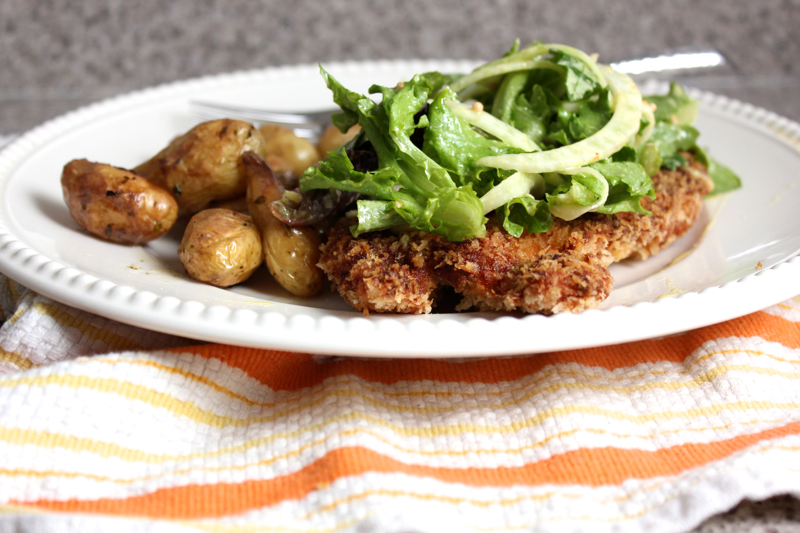
This thin and crispy chicken reminds me of an amped-up schnitzel: its perfectly golden crust is spiked with mustard, lemon, and oregano. The combination pairs wonderfully with a fennel salad tossed in dijon dressing, but the salad and chicken could each shine individually as well. I zeroed in on this recipe in the Smitten Kitchen cookbook after I was at a complete loss for cooking inspiration after a spate of Thai dishes. This recipe kicked me back into gear. After a day at work, however, this recipe is a bit laborious to make from start to finish. Despite my naive ambition, I was very pleased the results. This chicken is perfectly crisp and SO flavorful. Definitely worth making when you have the time or when you can get a head start.

Crusty Dijon Chicken with Fennel Salad

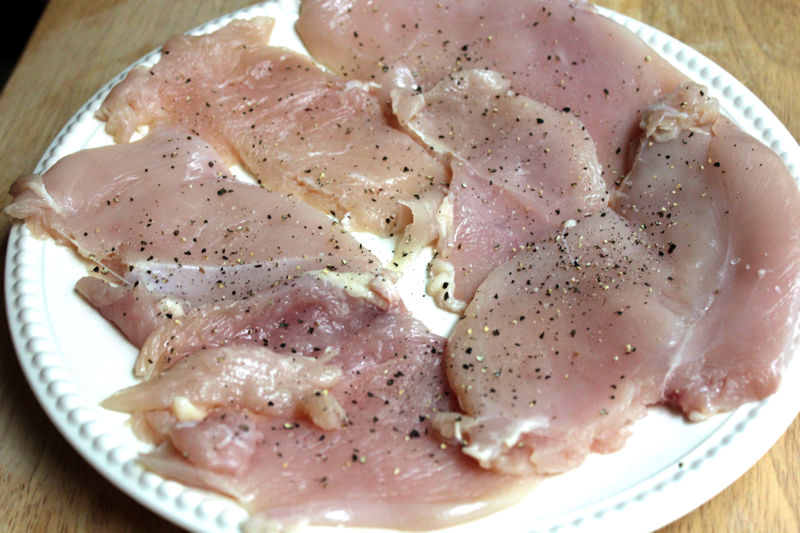
Begin by preparing the chicken. Slice two large chicken breasts in half crosswise so that you get two cutlets out of each breast. The easiest way to slice a chicken breast this way is to put it on a cutting board, pick up a sharp knife, and press down on the chicken breast with your free palm. Bring your eyes level with the chicken and slice through the breast horizontally, taking care to avoid cutting your hand that is pressing down on the chicken. Once the chicken is cut, place a cutlet between 2 sheets of wax paper, and pound it uniformly thin with a rolling pin or meat mallet. Then, season one side of each cutlet with salt and pepper.

Crusty Dijon Chicken with Fennel Salad

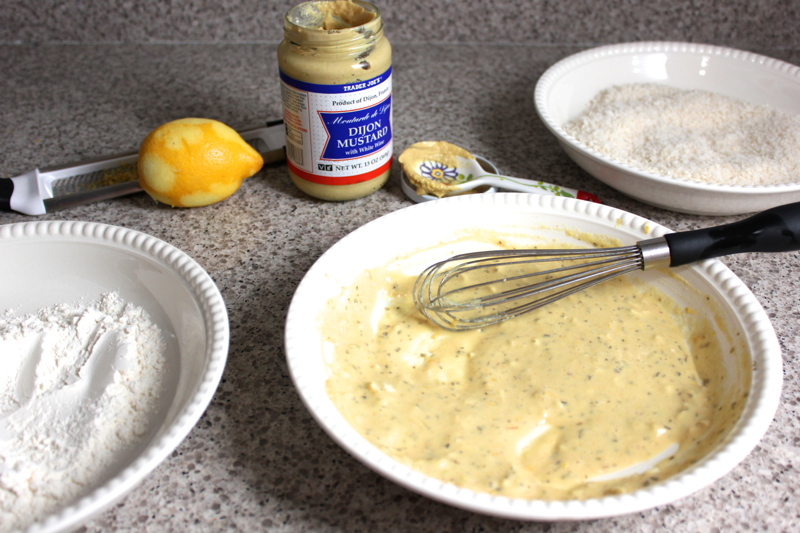
Get out 3 shallow bowls, and set up your crusting station. To the first bowl, add 1/4 cup of flour. To the second bowl, add 1 egg white, 2 tablespoons of dijon mustard, 2 minced garlic cloves, 1 teaspoon of dried oregano, and 1/2 teaspoon of lemon zest. Whisk the ingredients together until they are evenly combined. To the third bowl, add 1.5 cups of panko breadcrumbs.

Crusty Dijon Chicken with Fennel Salad

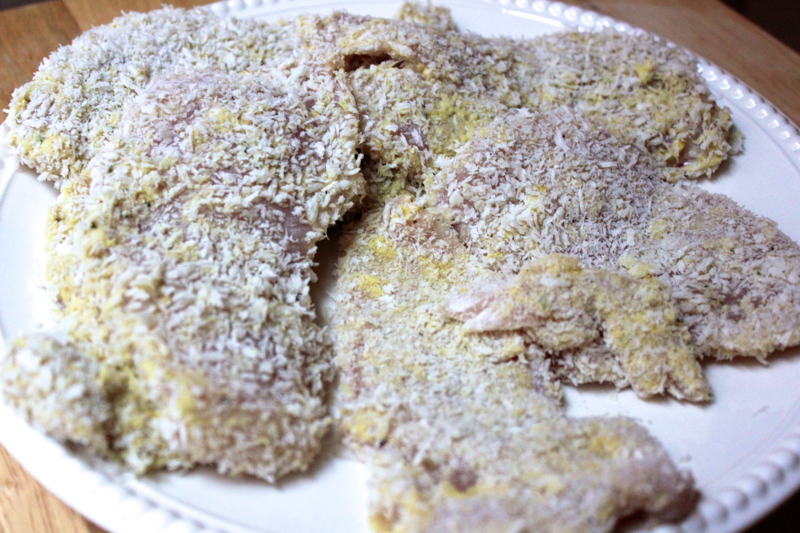
Turn a piece of chicken in the flour, and shake off the excess. Then, coat the chicken in the mustard mixture (don’t let the mustard mixture go on too thick or else you won’t have enough left to coat the remaining pieces of chicken). Lastly, coat the chicken in the breadcrumbs, making sure the entire thing is covered. Repeat with the remaining pieces of chicken. Put the chicken on a plate, and cover the plate with plastic wrap. Put the chicken into the fridge for 1 hour, which the original recipe says allows the coating to set. I followed the instructions and let my chicken rest, so I don’t know how important this step really is. But I do know that my refrigerator smelled incredible one hour later. Alternatively, you could leave the chicken in the fridge for a day until you’re ready to cook it.

Crusty Dijon Chicken with Fennel Salad

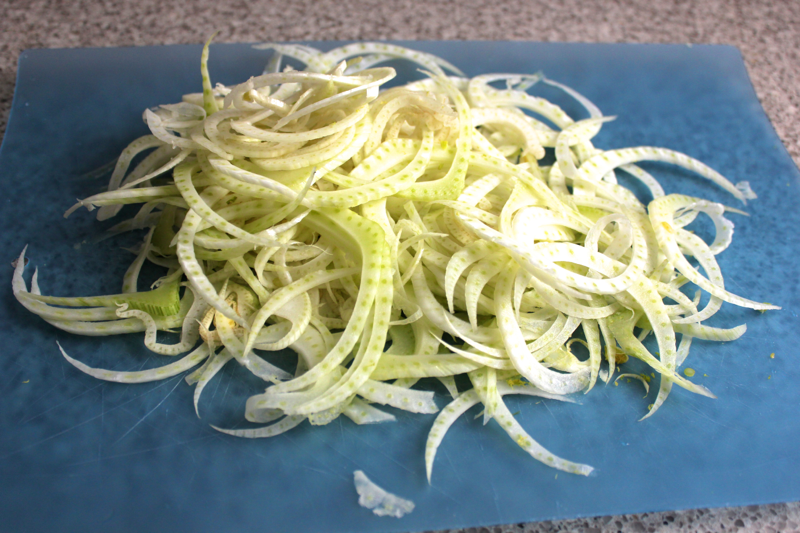
While the chicken rests, prepare the salad. Use a mandoline to thinly slice a small fennel bulb. Pick out any pieces of tough core. You’ll add an equal amount of arugula to the salad later. For the dressing, whisk together 3 tablespoons of lemon juice, 2 tablespoons of coarse dijon mustard (the kind with the seeds) and 1 tablespoon of smooth dijon mustard (the kind without the seeds). I was out of coarse dijon, so I used 2 tablespoons of smooth and 1 tablespoon of mustard seeds. Once those ingredients are combined, while whisking, slowly pour in 1/4 cup of olive oil. Taste the dressing, and adjust any components. Don’t assemble the salad until you’re ready to serve it.

Crusty Dijon Chicken with Fennel Salad

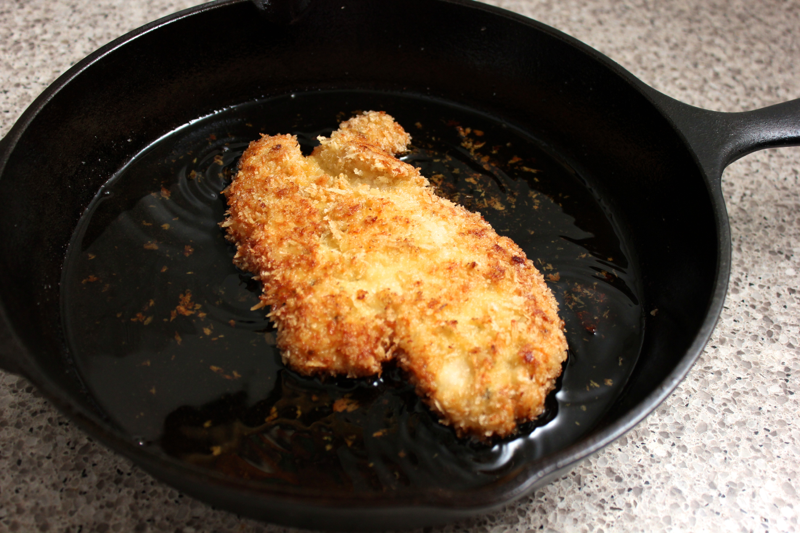
When you’re ready to cook the chicken, heat your oven to 175º F. Then, fill a skillet with 1/2 inch of oil (a mixture of olive and vegetable oils works well, but olive oil alone will smoke you out). Heat the oil over medium-high until it sizzles when a breadcrumb is dropped in it. In batches, cook the chicken on one side until you can see it getting golden around the edges (about 3-4 minutes), and then flip it over until the bottom is golden brown and the chicken is cooked through (about another 2-3 minutes). Quickly drain the chicken on paper towels, transfer it to a cooling rack set on a baking sheet, and put the baking sheet into the oven to keep the chicken warm while you continue cooking. The cooling rack allows air to circulate all around the chicken and prevents it from getting soggy. You worked so hard for that beautiful, golden crust, so keep it alive!

Crusty Dijon Chicken with Fennel Salad

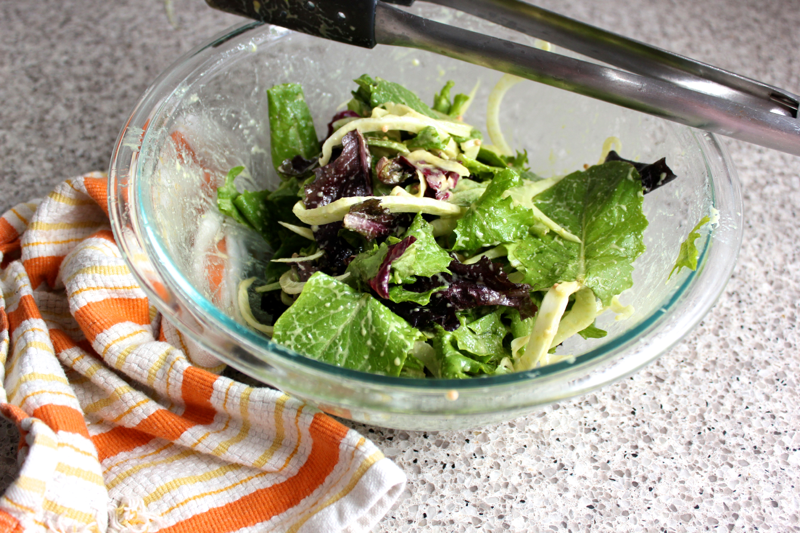
When you’re ready to serve, put the dressing in the bottom of a salad bowl. Add the sliced fennel and an equal amount of arugula. Toss it to coat. Sadly, DC was having an arugula shortage (seriously) on the day I made this recipe, so I had to resort to a salad mixture, and it was just fine.

Crusty Dijon Chicken with Fennel Salad

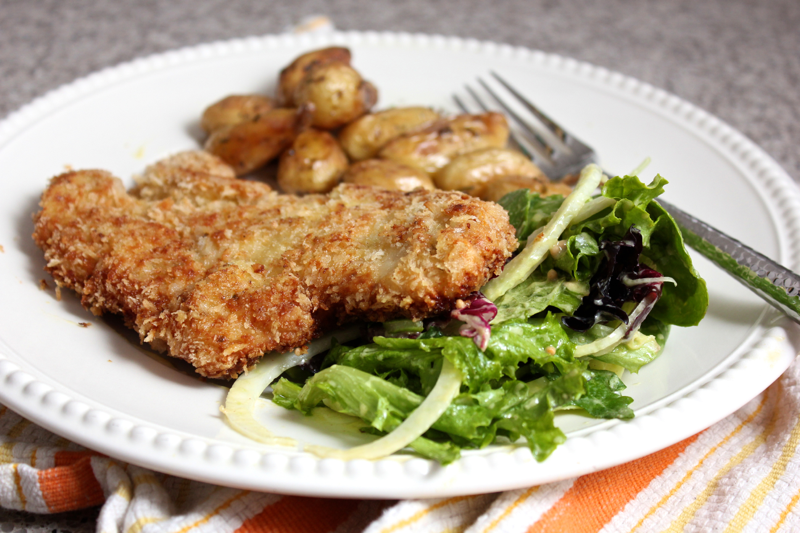
Serve the chicken with the salad, and eat it up. You’ll be amazed by how clearly you can taste the mustard, lemon, and oregano in the chicken. The flavors are bright and fantastic, lightening up a fried delight. The salad keeps things fresh too. I know David is waiting for me to make this meal again…on a weekend.

Shopping list:

For the chicken:

  • Chicken breasts- 2
  • Salt and pepper
  • Flour- 1/4 cup
  • Egg white- 1
  • Dijon mustard- 2 tablespoons
  • Garlic- 2 cloves
  • Dried oregano- 1 teaspoon
  • Lemon zest- 1/2 teaspoon
  • Panko breadcrumbs- 1.5 cups
  • Oil for frying

For the salad:

  • Lemon juice- 3 tablespoons
  • Coarse dijon mustard- 2 tablespoons
  • Smooth dijon mustard- 1 tablespoon
  • Olive oil- 1/4 cup
  • Arugula
  • Fennel- 1 small bulb
Print Friendly, PDF & Email

Taste of Thai: Massaman Chicken Curry

Taste of Thai: Massaman Chicken Curry

When David and I visited Thailand last year, we learned how to make massaman chicken curry in a cooking class. It was so delicious! I bought some massaman curry paste in the airport on our way home with some of our excess Thai Baht, but I promptly lost the curry paste once we returned home. While packing for our recent move, I unearthed the curry paste and counted the hours until I could finally make the fabulous curry in our new place.

Thailand

Here’s a picture of the curry we whipped up in Thailand. Massaman curry is on the milder side, and it usually includes some kind of potato.

Taste of Thai: Massaman Chicken Curry

I really wanted to learn how to make curry paste from scratch in Thailand, but I was too busy being sick during our originally-scheduled cooking class. So if you can’t find massaman curry paste in the market, well, I am very sorry for your loss.

Taste of Thai: Massaman Chicken Curry

To make this one, get a can of coconut milk (avoid the low fat kind- it is too watery). If you’re including potato in the curry, cook it almost all the way through, either by microwaving, baking, or boiling it. A sweet potato adds nice color. Once the potato is cooked, remove its skin and cut it into chunks. Thinly slice 1 shallot as well.

Taste of Thai: Massaman Chicken Curry

Thinly slice 2 chicken breasts by using a sharp knife to shave them on the diagonal.

Taste of Thai: Massaman Chicken Curry

Once the curry add-ins are prepared, add 3 tablespoons of the curry paste to a pot over medium heat, and stir it around until it becomes fragrant. Then, pour the can of coconut milk into the pot, and whisk it until it fully combines with the curry paste. Bring the curry to a simmer, and then add in the chicken, potato, and shallot. Put a lid on the pot, and let it simmer for 5 minutes.

Taste of Thai: Massaman Chicken Curry

Remove the lid from the pot, and add in 3/4 cup of whole cherry tomatoes. The tomatoes are so delicious to eat with this curry, adding a savory-sweet component, so don’t leave them out. Continue to simmer the curry for another 5-10 minutes until the tomatoes burst, the chicken is cooked through, and red oil from the curry paste has risen to the top. You can simmer the curry with the lid on if it has a good consistency or with the lid off if it needs to thicken.

Taste of Thai: Massaman Chicken Curry

Serve the curry over rice, garnishing it with chopped, toasted peanuts and fresh cilantro. I LOVE the flavor of massaman curry. I had some leftovers and put them onto my homemade baguette for a tasty sandwich- it was fabulous. Now that I’ve used up all of my airport curry paste, I’m off to find some more.

Shopping list:

  • Massaman curry paste- 3 tablespoons
  • Coconut milk- 1 can (approximately 14 ounces)
  • Sweet potato- 1
  • Shallot- 1
  • Chicken breasts- 2
  • Cherry tomatoes- 3/4 cup
  • Peanuts- 1/4 cup
  • Cilantro
  • Rice
Print Friendly, PDF & Email

We’ve Got This in the Bag-uette!

We've Got This in the Bag-uette!

I love bread, especially French baguettes. There is nothing better than walking into a Parisian bakery right after the baguettes come out of the oven (either early, early in the morning or a few hours before dinner time) and carrying home a still-warm baton, nibbling off the extra-crispy end. The crackly crust gives way to steaming, soft insides that are fluffy with small air pockets. And the flavor is just so unique–a taste not found in any other bread.

We've Got This in the Bag-uette!

So, when I took a bread cooking class that produced a baguette that was unexpectedly similar to the Parisian loaves of my dreams, I knew that warm baguettes would be popping out of my oven and into my mouth with regularity. I put all of the bread I baked in the class into my purse, and met David and Stella on my way home. Stella was as excited about the baguette as I was, and when I was foolish enough to carry my purse in my hand, she locked on to the exposed end of the baguette and had herself a nice treat. She attempted a repeat performance when I was taking a picture of my bread bounty, but I foiled her attempt with a panicked screech. But don’t worry about little Stella- she can lick up my many crumbs.

We've Got This in the Bag-uette!

Making baguettes at home is a two-day affair. One portion of the dough needs to be prepared a day before the rest of the dough, which contributes to the baguette’s fabulous flavor. To begin, add 1/2 teaspoon of active-dry yeast to 6 ounces of warm water, and set it aside. To the bowl of a stand mixer, add 5 ounces of all-purpose flour, 5 ounces of bread flour, and 1/2 teaspoon of salt. Mix the ingredients using the paddle attachment, and then mix in the water and yeast. Mix well to form a wet dough, adding additional tablespoons of water if it doesn’t seem wet enough. Mix the dough for 4 minutes, or more if you’re kneading by hand.

Remove the dough from the bowl, grease the bowl, and then return the dough. Cover the bowl with plastic wrap, and let the dough rise in a warm place until it doubles in size. I like proofing dough in the oven– my last oven could be set to 100º F for this purpose, but my new oven is more limited. Instead, I turned the oven on, and as soon as it starts to heat up and registers 101º F, I turn it off and put the dough in. Once the dough has risen, pull it away from the sides of the bowl to deflate it. Cover the bowl with plastic wrap again, and put the dough in the refrigerator overnight to ferment.

Remove the dough from the refrigerator about 1 hour before you want to proceed with the rest of the baguette recipe so that it can come to room temperature. Add 1 teaspoon of active-dry yeast to 6 ounces of warm water, and set it aside. To the bowl of a stand mixer, add 5 ounces of all-purpose flour, 5 ounces of bread flour, 1 teaspoon of salt, and the room-temperature dough you made the day before. Mix the ingredients in the bowl with the paddle attachment, and with the mixer running, pour in the water and yeast. Continue mixing the dough for 6 minutes, or for 10 minutes if kneading by hand. The dough should be sticky but not gooey- add tablespoons of water if the dough is too dry.

We've Got This in the Bag-uette!

Once the dough is mixed, you could divide it in half and freeze one portion to bake at another time. This whole recipe makes four 2-foot-long baguettes (baguettes tend to go stale quickly, and should never go to waste!). Remove the dough you want to bake from the bowl, grease the bowl, and return the dough. Cover the bowl with plastic wrap, and allow the dough to rise until it doubles in size. Stella knew that more baguettes were on the horizon.

We've Got This in the Bag-uette!

Once doubled, divide the dough into even pieces (4 if baking all of the dough, 2 if baking half of the dough). Don’t knead the dough any more because you want it to retain its air pockets. Put a piece of parchment paper on a baking sheet. Lightly flour a surface and your hands, and gently roll the divided dough into baguette-shaped logs that are the length of your baking sheet. Transfer the baguettes to the baking sheet, and let them rise at room temperature until they puff up a little more. While the baguettes puff, heat your oven to 500º F. Once puffed, score the baguettes with a sharp knife. Make your cuts about 1/4 inch deep or else they might disappear like mine did.

We've Got This in the Bag-uette!

Put the baking sheet into the oven, and lightly mist the baguettes with water from a spray bottle. Close the door, wait 30 seconds, and then repeat the misting process 2 more times. The steam helps the baguettes form a nice crust. After the third misting session, reduce the oven’s temperature to 450º F, and bake the baguettes for 10 minutes. After that time is up, rotate the pan, and bake the baguettes for another 5-10 minutes until they are golden brown (or the internal temperature of the baguettes is 205º F). Once the baguettes are cool enough to handle, feel free to gnaw into that crunchy, crusty end and pretend you’re walking the streets of Paris. Oh la la!

Shopping list:

  • All-purpose flour- 10 ounces
  • Bread flour- 10 ounces
  • Salt- 1.5 teaspoons
  • Yeast- 1.5 teaspoons
Print Friendly, PDF & Email