Chocolate Granola

chocolate granola

I love having granola around because it makes for such a satisfying breakfast when it’s paired with Greek yogurt. After a year of sticking to my favorite granola recipe, I ventured into this chocolate variety, and it’s great too! Let’s just say, my kitchen sees more than its fair share of oats.

chocolate granola

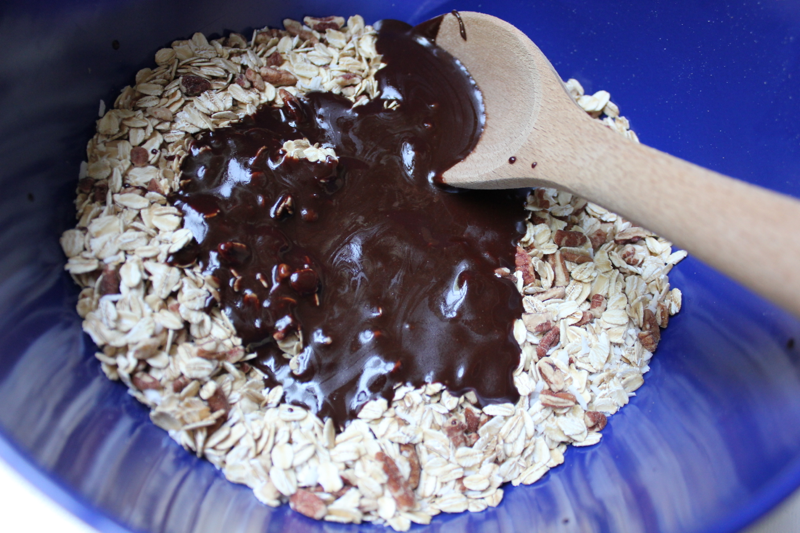
To make this granola, preheat your oven to 325º F. Add 2 cups of rolled oats, 1/2 cup of unsweetened coconut, 1/2 cup of pecans or walnuts, and 1/8 teaspoon of salt to a bowl. To a small pot, add 2 tablespoons of coconut oil, 2 tablespoons of honey, 1/2 teaspoon of vanilla extract, and 1/4 cup of cocoa powder. Whisk the pot over low heat until the oil and honey have melted and all of the ingredients have combined. Pour the chocolate mixture over the oat mixture.

chocolate granola

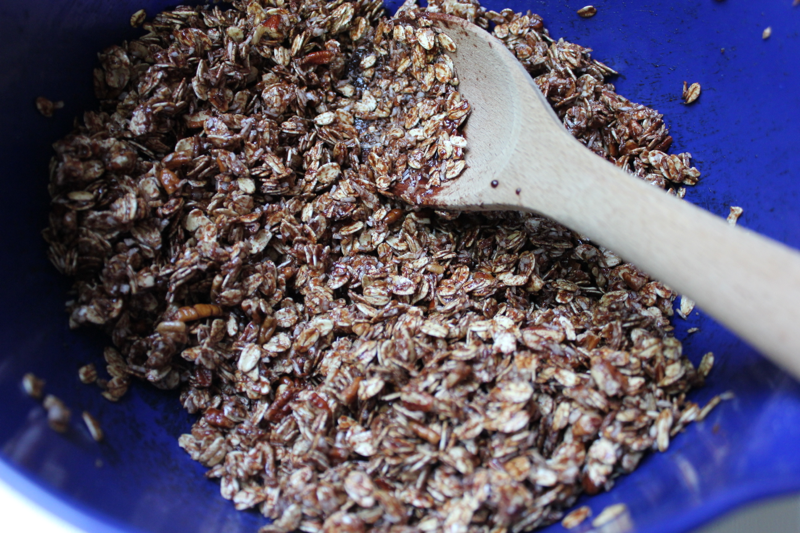
Mix the oats until they are uniformly coated with the chocolate. Lightly grease a baking sheet, and spread the oats onto it. Bake the oats for 15 minutes, then remove the pan from the oven, and stir the oats. Put the pan back into the oven, and let it cook for another 10 minutes until the oats are toasted. Remove the pan from the oven, and let it rest until the oats have completely cooled.

chocolate granola

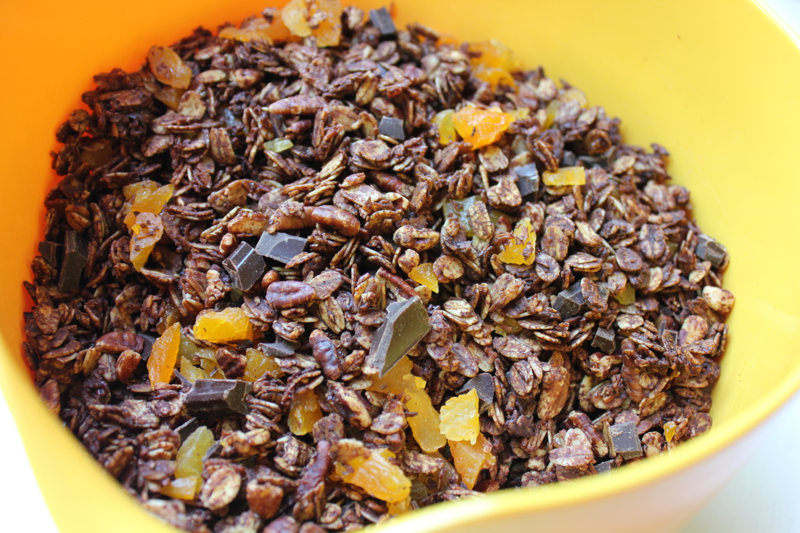
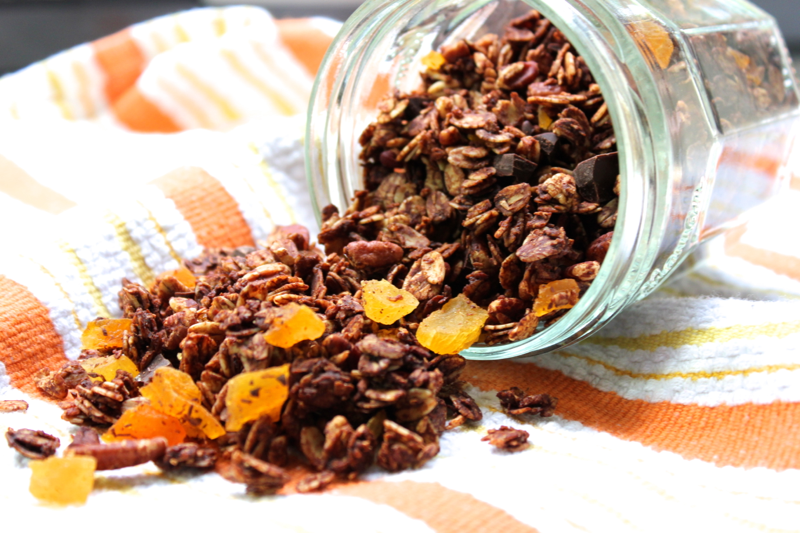
Chop up 2 ounces of dark chocolate and 1/4 cup of dried apricots. Stir them in with the oats. You can also experiment with any other mix-ins that suit you.

chocolate granola

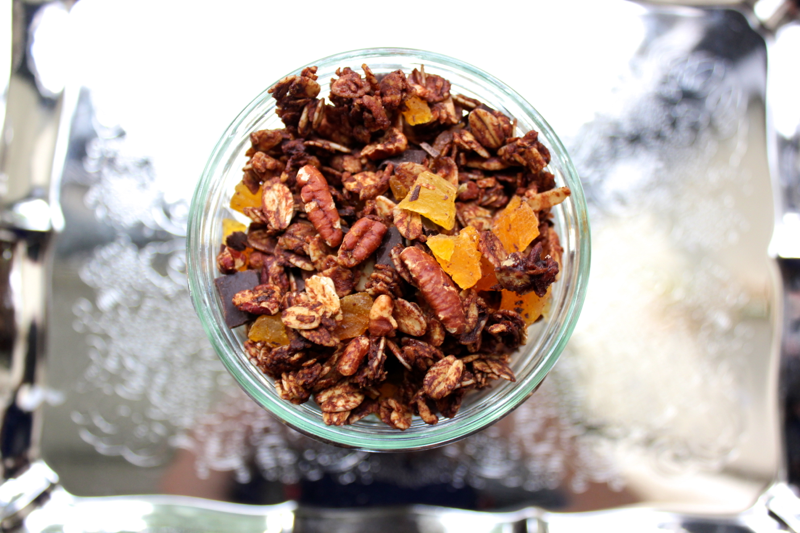
Transfer the granola to an air-tight container. Eat it on yogurt, with milk, or by the handful. Yum!

This recipe is adapted from the Yummy Mummy Kitchen.

Shopping list:

  • Rolled oats- 2 cups
  • Unsweetened coconut- 1/2 cup
  • Pecans or walnuts- 1/2 cup
  • Salt- 1/8 teaspoon
  • Coconut oil- 2 tablespoons
  • Honey- 2 tablespoons
  • Vanilla extract- 1/2 teaspoon
  • Cocoa powder- 1/4 cup
  • Dark chocolate- 2 ounces
  • Dried apricots- 1/4 cup
Print Friendly, PDF & Email

Savory Noodle Kugel

noodle kugel

Throughout my life, I have always looked forward to noodle kugel. I love the crunchy noodles that toast up on top. For many years, I would only eat the crunchy noodles, decimating the kugel for anyone else who cared to enjoy it. Now, I like the whole thing, but the crunchy noodles and the sweet onions are still my favorites.

noodle kugel

To make this kugel, dice 2 onions. Heat 1-2 tablespoons of vegetable oil in a pan, and fry the onions until they begin to brown. They get so sweet and savory that it takes self-control to keep from eating them all! Also cook 1 pound of egg noodles in salted water until they are al dente. Drain the noodles, and run them under cold water to stop them from over-cooking.

noodle kugel

Preheat your oven to 350º F. Put the noodles and the onions, and 1 tablespoon of vegetable oil, in a large mixing bowl. Season the noodles with salt and pepper, stir, and taste the mixture. If you over-pepper like I did, you can rinse a portion of the noodles in a colander and then add them back to the main bowl.

noodle kugel

Once the noodle mixture tastes good, whisk 4 eggs, and stir them into the noodles.

noodle kugel

Lightly grease a large baking dish, and pour in the noodles, shaping them into an even layer.

noodle kugel

Bake the kugel for approximately 40 minutes, rotating the pan around half way through for even browning. The kugel is done when you have those glorious crispy noodles all over the top. Cut the kugel into individual portions, and dole it out to enjoy. I love having some of this kugel leftover because it reheats to its full crispy glory in the oven, and then I can peel it to pieces and really enjoy it when no one else is watching.

Shopping list:

  • Onions- 2
  • Egg noodles- 1 pound
  • Eggs- 4
  • Salt and pepper
  • Vegetable oil- 2 to 3 tablespoons
Print Friendly, PDF & Email

Braiding a Round Challah

round challah

It is customary to have round challahs instead of braided challahs for Rosh Hashanah and Yom Kippur, the holidays marking the Jewish new year. The round shape of the challah is supposed to represent cyclical time and new beginnings. I already perfected a challah recipe that I love, but this was my first time braiding it into a round shape. Although the finished loaf looks complicated, the braiding process is really easy! Here’s how you can follow along (paying more attention to the pictures than the text if you’re a visual learner):

round challah

When you’re ready to braid your challah, separate the dough into four even pieces. Use your hands to roll and flatten each piece into a long strand, about 2 feet long. The strands should be relatively equal in length. Place two of the strands parallel to each other. Take the third strand, and place it perpendicular to the first two strands, weaving it between the two so that it crosses on top of the first strand and below the second strand. Do the same thing with your fourth piece, except that the fourth piece should cross above the second strand and below the first strand. Move all of the strands close to each other so that there is no hole in the center of the knot. You should have 4 sets of parallel strands.

round challah

For each set of parallel strands, take the strand that comes out from under the knot and cross it over the strand that comes out of the top of the knot so that the two strands form a 90º angle. The two strands should now be perpendicular to each other, and you should have four new sets of parallel strands.

round challah

Continue locating the four sets of parallel strands of dough and crossing the strand that comes out of the bottom of the knot over the strand that comes out of the top of the knot so that the two strands form a 90º angle.

round challah

round challah

Once your strands of dough shorten to a point that you can no longer cross them, tuck the ends of each strand under the loaf.

round challah

You now have a round challah! Transfer the loaf to a baking sheet, and proceed with your challah recipe (let the loaf rise, brush with an egg wash, and then bake). Happy holidays!

Print Friendly, PDF & Email