I Bet-zle You’ll Like My Spaetzle

I Bet-zle You'll Like My Spaetzle

I have wanted to make spaetzle for quite some time, and I am glad that I finally did. It was fun! Spaetzle is a German/Austrian egg noodle/dumpling that is twisty and rustic. Once made, there are a lot of ways to eat spaetzle. My favorite is crisped up in a pan, but you can also toss it with butter or oil, or bake it into a cheesy, macaroni-like tangle. It took some experimenting in the kitchen to figure out the best way to form the spaetzle before dropping them into boiling water to cook. Although dedicated spaetzle makers are available, I had fantastic luck re-purposing a kitchen accessory that I already owned. I’m sure you can find something that will work for you too!

I Bet-zle You'll Like My Spaetzle

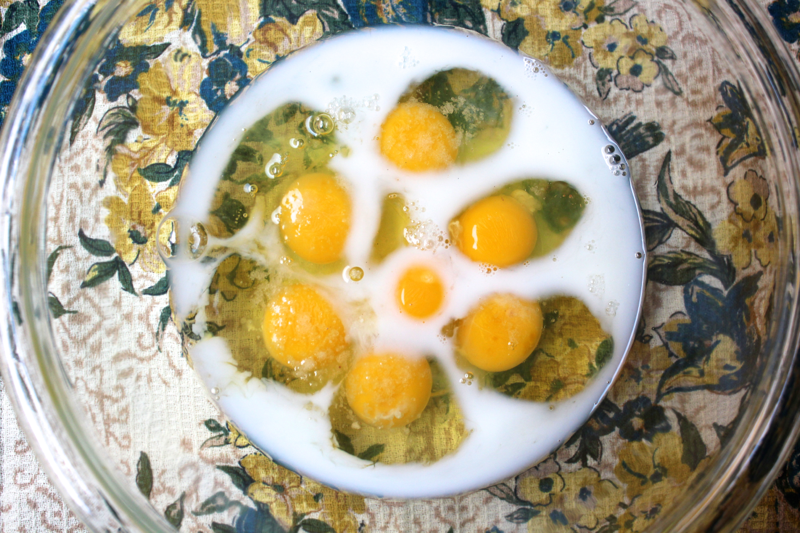
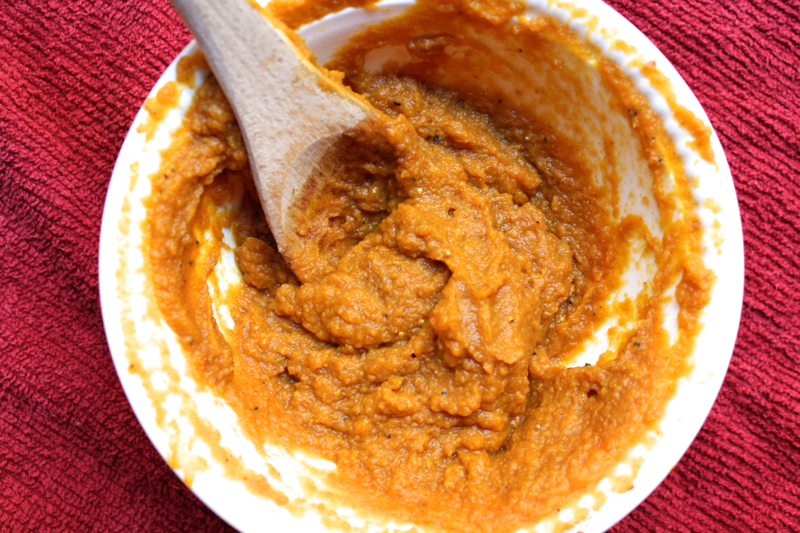
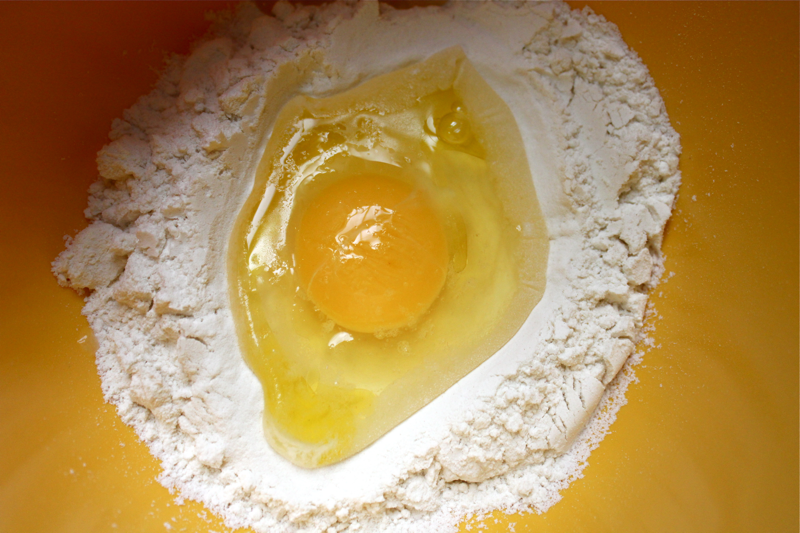
To make the spaetzle batter, whisk together 7 large eggs with 1/4 cup of milk and 1.25 teaspoons of fine sea salt. Then, stir in 2 cups of flour until most of the lumps are eliminated. The quantities specified in this recipe make a lot of spaetzle. I’d estimate around 12 side servings or 6 main course servings, maybe even more. You could halve the recipe and make less or freeze any extra for a later use. How do you halve a recipe that calls for 7 eggs, you ask? I would whisk the odd egg on its own very well and then pour half of it off.

I Bet-zle You'll Like My Spaetzle

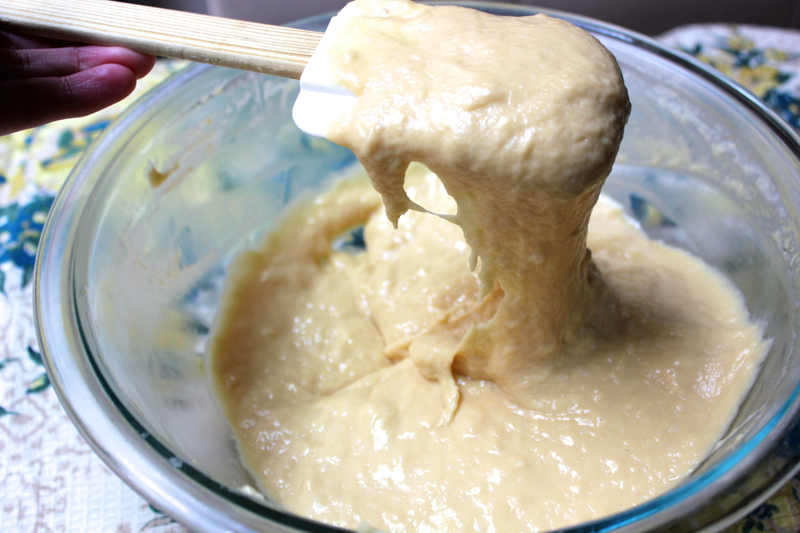
Once the batter is combined, cover it with plastic wrap, and transfer it to the refrigerator to rest for 1 hour. The resting time allows the batter to develop gluten, which contributes to the batter’s smooth, stretchy consistency. While the batter chills, bring a large pot of salted water to a simmer. Also, fill a large bowl with ice water.

To form the spaetzle, you’ll need to use a silicone spatula to press the batter through an item with holes and allow the batter to drop into the pot of simmering water. I first tried using a metal steamer/straining basket, which I set on top of the pot. It didn’t work because the strainer prevented the hot steam from leaving the pot, and the built-up heat cooked the batter before I could press it through the holes. My next attempt was much more successful- I used the plastic strainer top that came with my fat separator. It’s nice because it has a tongue-type handle that allowed me to hold it over the pot easily.

I Bet-zle You'll Like My Spaetzle

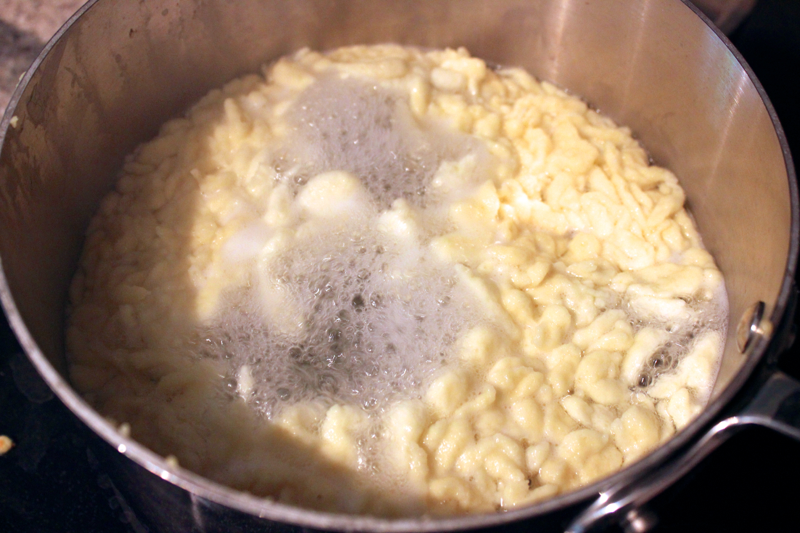
Once you find something that works for you, dollop some of the batter onto it, and use a spatula to press the batter through the holes. The batter will form raindrops that land in the water, sink, and then float to the top. The spaetzle expand and turn opaque as they cook, which takes about 1 minute. When the batch is done, use a skimmer to remove it from the pot, and transfer the spaetzle into the bowl of ice water. Repeat until you’ve cooked all of the batter.

I Bet-zle You'll Like My Spaetzle

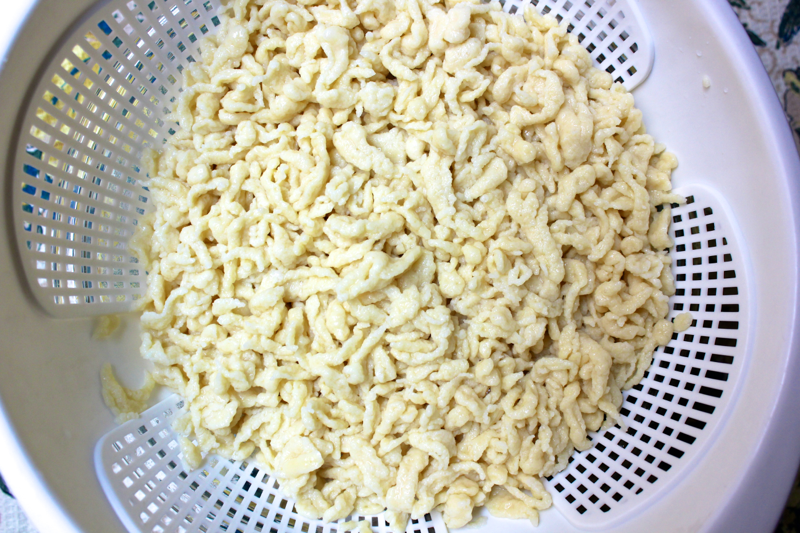
Drain the cooked spaetzle from the ice water. You can store it in containers in the refrigerator for up to a week. 12 servings of spaetzle is a whole lot, so I came up with several different ways to serve it.

I Bet-zle You'll Like My Spaetzle

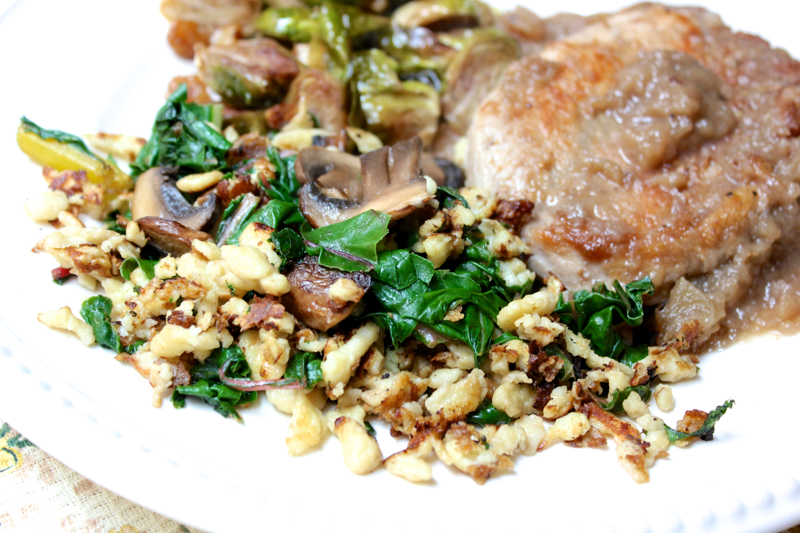
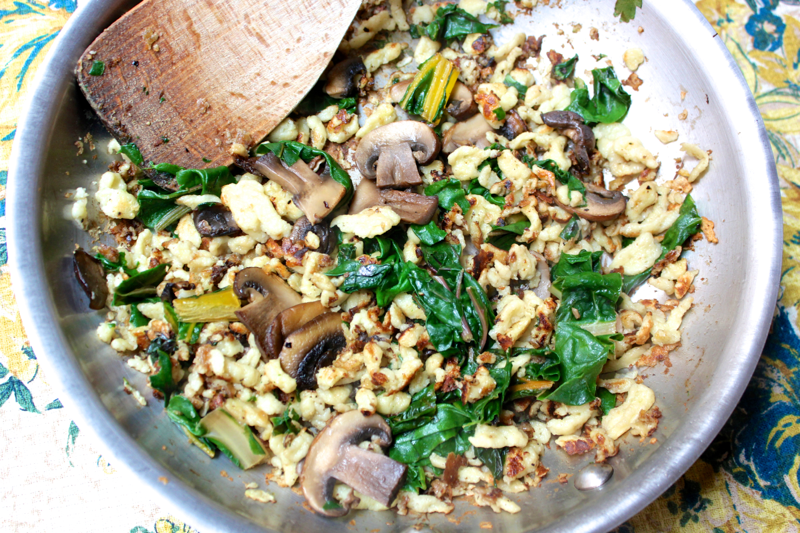
  1. Pan fried: Add 1 sliced shallot and some swiss chard leaves to a large, lightly oiled pan. Pour in about 1/4 cup of white wine, and let it cook off. Season the veggies with salt and pepper, melt in 2 tablespoons of butter, and add in 1-2 cups of the spaetzle. Fry it until it browns and turns crisp. The spaetzle picks up the best color and flavor in a stainless skillet, but it tends to stick. A fish spatula is really helpful to scrape and turn it. Alternatively, the spaetzle glides easily in a non-stick skillet, but the flavor isn’t as deep. Zest 1/2 lemon over the spaetzle. Grated gruyere cheese is also nice. To make it more of a meal, you can also add some diced, pre-cooked chicken when you add the spaetzle.
  2. Baked with cheese: You can make mac and cheese with spaetzle instead of pasta. Melt 3 tablespoons of butter in pot, stir in 3 tablespoons of flour, and then pour in 1 cup of milk. Season the milk with salt and cayenne pepper. Stir the milk until it thickens, remove the pot from heat, and melt in 1 cup of grated cheese (gruyere and cheddar are nice). Stir in about 2 cups of spaetzle and optional meal-enhancers: chicken, bacon, swiss chard, mushrooms, parmesan cheese, etc. Transfer the spaetzle and cheese to a greased baking dish, top it with more grated cheese, and bake it at 400º F until the top is golden brown.

How do you like to serve spaetzle? I need more techniques so I can finish eating my way through this big batch!

This recipe is adapted from Smitten Kitchen.

Shopping list:

  • Eggs- 7
  • Milk- 1/4 cup
  • Sea salt, fine- 1.25 teaspoons
  • Flour- 2 cups
Print Friendly, PDF & Email

Pomegranate Gin & Tonics + Herb & Lou’s Mixology

Pomegranate Gin and Tonic

Somewhere along the line, I fell in love with gin. It was probably around the time that I popped over to Green Hat Gin for a distillery tour, bought a bottle with my friends, and made some tiny, fantastic cocktails. I’ve made the bee’s knees countless times since then, but not frequently enough. For starters, my kitchen storage is less than ideal, and I can’t reach my cocktail shaker without a ladder (really). It also takes some effort to gather ingredients and heat the honey syrup. Then, in the gift bag for DC’s best event of the year, I got a tiny bottle of pomegranate gin and tonic mixer from Poste. Delicious and instantly gratifying. Now that my tiny bottle has been consumed, my pomegranate gin and tonics require a bit more effort, and I’ve realized the value of high-quality, sophisticated mixers. Lucky for me, my buddy Reid Rosenthal just launched a line of mixers that fit the bill. More about that later.

Pomegranate Gin and Tonic

But first, the pomegranate gin and tonics. To make the base, a spiced pomegranate syrup, simmer 8 ounces of pomegranate juice with 1 teaspoon of black peppercorns and 1 cinnamon stick until the juice stops bubbling and is thick enough to coat the back of a spoon. Strain out the peppercorns and cinnamon, and then let the syrup cool. For 2 gin and tonics, fill a cocktail shaker with ice. Pour in 3 ounces of gin and 1.5 ounces of the spiced pomegranate syrup. Put a lid on the shaker, and shake it well. Strain the mixture into two small glasses (champagne flutes work nicely), and then top the glasses off with sparkling water (granted, not truly a tonic). Garnish each cocktail with a few pomegranate seeds (they’ll take a few minutes to float to the top), and enjoy! The cocktails are slightly tangy and have a deep flavor from the spices. Also, some other uses for any leftover pomegranate syrup are red pepper dip and lemonade. So versatile!


If you’re not up for all this effort to get your cocktail on, check out Reid’s video for his new line of mixers, Herb & Lou’s. Watch out for a Parker sighting in the video too! Reid has been working hard to develop fantastic flavor combinations for his mixers that are each suited to a type of alcohol. My favorite is the Cecile (cucumber, watermelon, clover, honey, and thyme for tequila). I feel so sad for people who have had bad experiences with tequila.

Pomegranate Gin and Tonic

Reid’s dog, Cooper, is the namesake for…the Cooper (blood orange and ginger for bourbon)! Cooper is Stella’s buddy and joined us for our beach day! And as for gin, Reid pairs pink grapefruit, chili, and basil. Swoon. If I’m speaking your language, check out Herb and Lou’s Kickstarter to kickstart their bottling and get our bars stocked. What are your favorite cocktail combos?

Shopping list:

  • Pomegranate syrup (pomegranate juice, black peppercorns, cinnamon stick)- 1.5 ounces
  • Gin- 3 ounces
  • Sparkling water
  • Pomegranate seeds
Print Friendly, PDF & Email

Pumpkin Parmesan Ravioli

Pumpkin Parmesan Ravioli

I must apologize to my pumpkin-heads; I have waited far too long to tell you about pumpkin ravioli. I generally find ravioli to be a huge pain to make, but it is so delicious that cravings drive me to devote an afternoon to it here and there. As far as ravioli fillings go, pumpkin is one of the easiest– and the most seasonal. Here, it’s silky smooth, laced with parmesan cheese, and delicately encased inside of fresh, paper-thin pasta. If that isn’t delicious enough, the ravioli is topped with pumpkin seed oil and toasted walnuts for extra oomph. It’s so delicious, you won’t want to limit it to fall.

Pumpkin Parmesan Ravioli

Begin with the filling. To make 2 servings, add 1 cup of pumpkin purée to a bowl. Season the pumpkin generously with salt and pepper, then spice it with cinnamon and nutmeg, tasting as you go. Finally, grate in parmesan cheese. Once combined, set the pumpkin aside while you make the pasta.

pasta

Add 1/2 cup of flour to a bowl, make a well in the center of the flour, and crack in 1 egg. Drizzle in 1/2 tablespoon of olive oil, and throw in a pinch of salt. Using a fork, scramble the egg in the center of the bowl and then begin incorporating the flour. Once the pasta forms a ball of dough, turn the dough out onto a floured surface, and knead it very well until it looks uniform and somewhat elastic.

pasta

If you’re using a KitchenAid pasta roller, set it to number 1. Otherwise, use your pasta roller’s widest setting. Run the pasta through the roller. Flour the pasta lightly if it is too tacky. Then, fold it into thirds, and slap down on it to remove any air bubbles. Continue passing the pasta through the roller at setting 1, flouring if necessary, and folding it into thirds until it becomes elastic.

pastaThen, turn the roller to setting number 2, or the next thickest setting. Pass the folded pasta through, with the long side of the pasta rectangle going in first. Without folding the dough again, continue decreasing the roller settings, passing the pasta through once, until you reach setting number 8, or the thinnest setting. If the pasta gets too long to manage during this process, you can use a sharp knife to cut it into sections on a piece of parchment paper to avoid sticking. Just remember which setting the pasta was on when you cut it so you can continue rolling where you left off.

Pumpkin Parmesan Ravioli

Bring a pot of salted water to a boil while you form the ravioli. Flour a ravioli mold, and lay one sheet of pasta over it. You can either pipe the pumpkin filling into the center of each ravioli, or use a 1 teaspoon measure to fill them up. Make sure the pumpkin stays in the center of each ravioli and doesn’t spread over to the edges. Prepare an egg wash by whisking together 1 egg and a splash of water. Use a pastry brush to paint the egg wash around the sides of the filling so that the ravioli seal.

Pumpkin Parmesan Ravioli

Carefully lay a second sheet of pasta over the mold, taking care to press the air out of each ravioli.

Pumpkin Parmesan Ravioli

Run a rolling pin around the sides of the ravioli mold to cut away the extra pasta, and then, in a quick motion, flip the mold over and sharply rap it down to force the ravioli out. Boil the ravioli for about 2 minutes until the pasta turns transparent and you can see the pumpkin filling inside. Remove the ravioli with a skimmer, draining them very well, and transfer them to a shallow bowl that has a small drizzle of olive oil in it to prevent the ravioli from sticking.

Pumpkin Parmesan Ravioli

Top the ravioli with a drizzle of dark green pumpkin seed oil for extra pumpkin flavor and a drizzle of olive oil. Toasted pumpkin seeds or toasted walnuts add a warm nuttiness, and extra parmesan cheese is always welcome, as is chopped sage. I experimented with this ravioli using wonton wrappers instead of homemade pasta, but the pasta was much better. It’s thinner (more enjoyable to eat) and more malleable (easier to fill with the pumpkin). So while I like wonton wrappers for tortellini, the real thing is better here. How many ways have you worked pumpkin into your meals so far this season?

Shopping list:

  • Pumpkin purée- 1 cup
  • Nutmeg
  • Cinnamon
  • Salt and pepper
  • Parmesan cheese
  • Flour- 1/2 cup
  • Egg- 1
  • Olive oil
  • Pumpkin seed oil
  • Walnuts or pumpkin seeds
Print Friendly, PDF & Email